
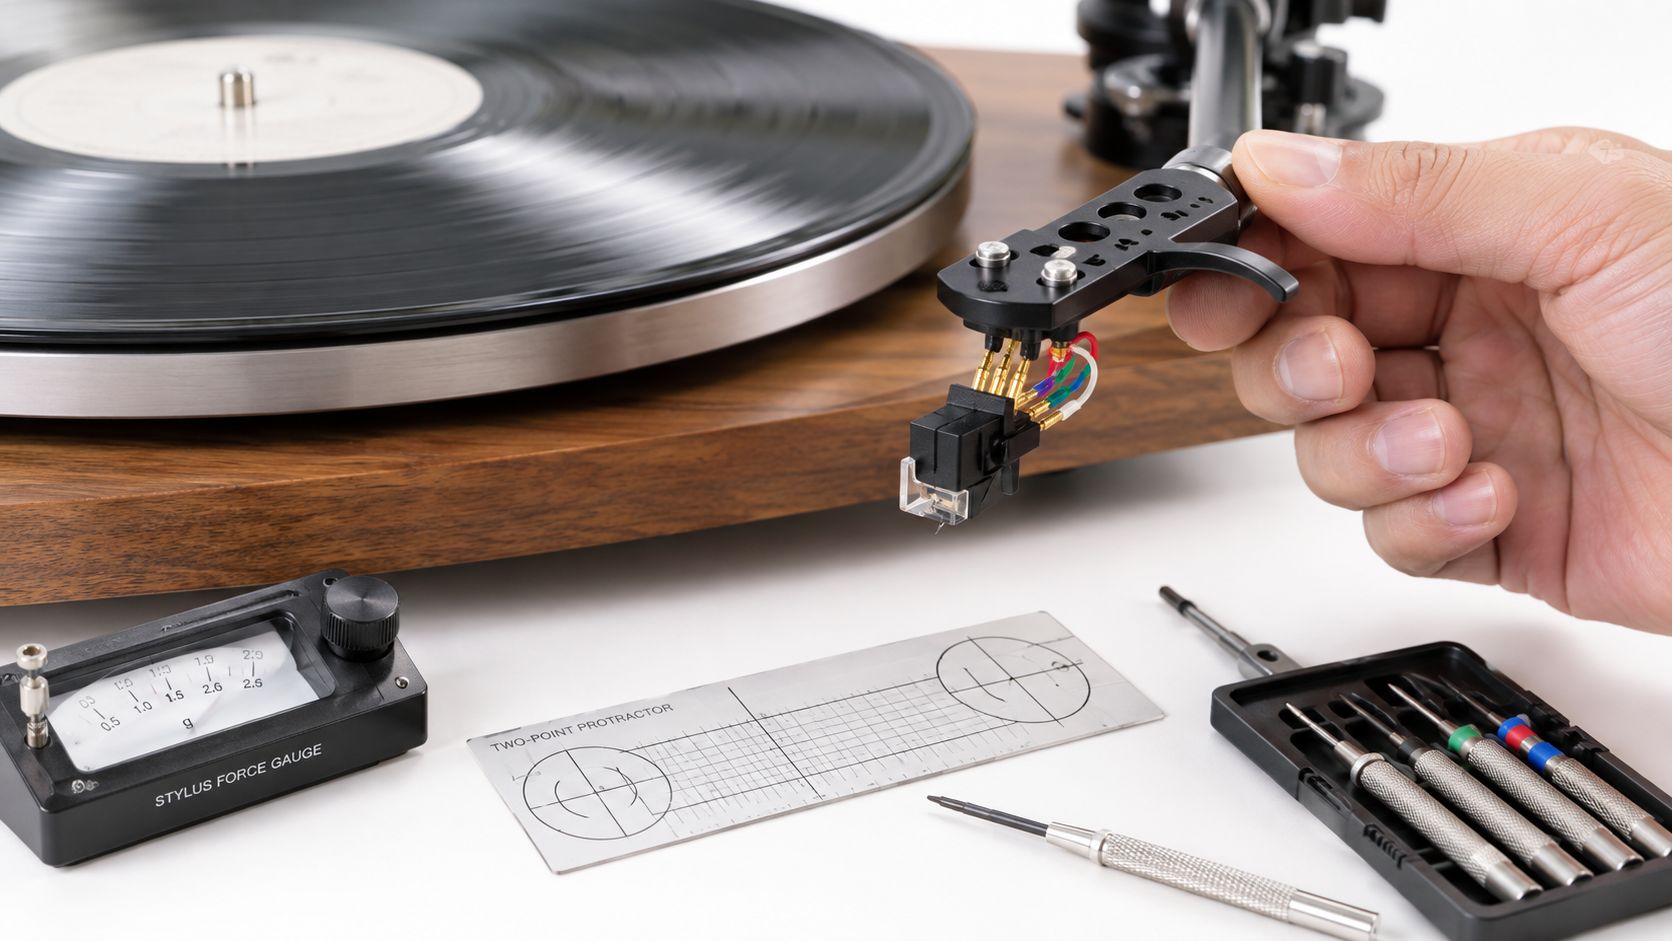
Most advice about replacing a turntable cartridge starts with the wrong idea. The cartridge isn't the upgrade. The setup floor is. A new body bolted into bad geometry will sound harder, thinner, and less stable than the cartridge you just removed.
I'm Marque Hersh, founder of Supermarket Sound, and I've learned that buying the part is the easy half. The work that pays you back happens afterward: overhang, offset angle, azimuth, vertical tracking force, anti-skate, and final listening checks. A correctly aligned budget cartridge can outperform a superior cartridge that's starving the groove with poor contact.
Table of Contents
- The Cartridge Is Not the Headline
- What You Need Before You Touch Anything
- Removing the Old Cartridge and Wiring the New One
- Alignment Is Geometry, Not Guesswork
- Tracking Force and Anti-Skate After the Swap
- Verifying With a Test Record
- What You Are Really Buying
The Cartridge Is Not the Headline
A cartridge replacement is often sold as a screwdriver job. Remove four wires, fit four wires, tighten two screws, play music. That description leaves out the load-bearing part of the installation.
The stylus has to meet the groove at the correct position and angle. Overhang and offset angle determine how the cantilever traces the record, while tracking force and anti-skate determine whether it stays planted in the groove. A two-point protractor exists because the geometry can't be trusted to your eye or to the apparent straightness of the cartridge shell.
The basic relationship is simple. Pivot-to-spindle distance equals effective tonearm length minus stylus overhang. Alignment systems such as Baerwald, Löfgren B, Löfgren C, and Stevenson choose different null points, which control tracking error at different parts of the record side. Baerwald, for example, uses null points at 66 mm and 120.9 mm, while the IEC groove boundaries run from 60.325 mm to 146.05 mm, and the older DIN standard runs from 57.5 mm to 146.05 mm. This alignment reference lays out the geometry clearly.
That isn't academic decoration. The downstream inherits the math. If the stylus sits too far forward, too far back, or at the wrong rotational angle, the cantilever meets the groove incorrectly across the side. You may hear vocal sibilance turn grainy, cymbals lose their edge, or the stereo image pull subtly toward one channel.
The setup floor beats the exotic component
A perfectly mounted cartridge with modest hardware can sound open, balanced, and rhythmically sure. A flagship cartridge with careless alignment can sound congested, splashy, and oddly aggressive. The stylus profile matters, but it can't rescue bad groove contact.
The cartridge itself also isn't a single universal category. Magnetic cartridges rose to dominance in the late 1940s and early 1950s as electrical record players displaced acoustic phonographs. Ceramic cartridges became common in low-end equipment during the 1950s to 1970s, while better hi-fi systems generally relied on magnetic designs. In 1958, Shure introduced the first stereo moving magnet cartridge, the M3D stereo Dynetic Cartridge, with 20 dB of separation at 20 kHz. The historical overview puts the modern replacement ritual in context.
The practical sequence is not complicated:
- Remove the old cartridge without stressing the tonearm leads.
- Wire the new cartridge according to its actual terminal markings.
- Set overhang and offset with a two-point protractor.
- Balance the arm and set the published tracking force.
- Set anti-skate, then verify the result by listening.
Buying the cartridge is the easy half. Calibration is the job.
What You Need Before You Touch Anything
Turn the system off before you touch the cartridge. Silence the phono input by powering down the phono stage or preamp, lower the cueing lever, and secure the tonearm so it can't swing across the platter while you work. A loose arm can turn a calm installation into a bent cantilever in one careless second.
Protect the stylus before you protect your pride. If the old stylus has a guard, fit it before removing the headshell. Keep the new stylus guard in place until the cartridge is wired and mechanically secure. If the stylus is removable, take it off or cover it while the cartridge is outside the headshell. The diamond is tiny, expensive, and entirely unimpressed by your confidence.
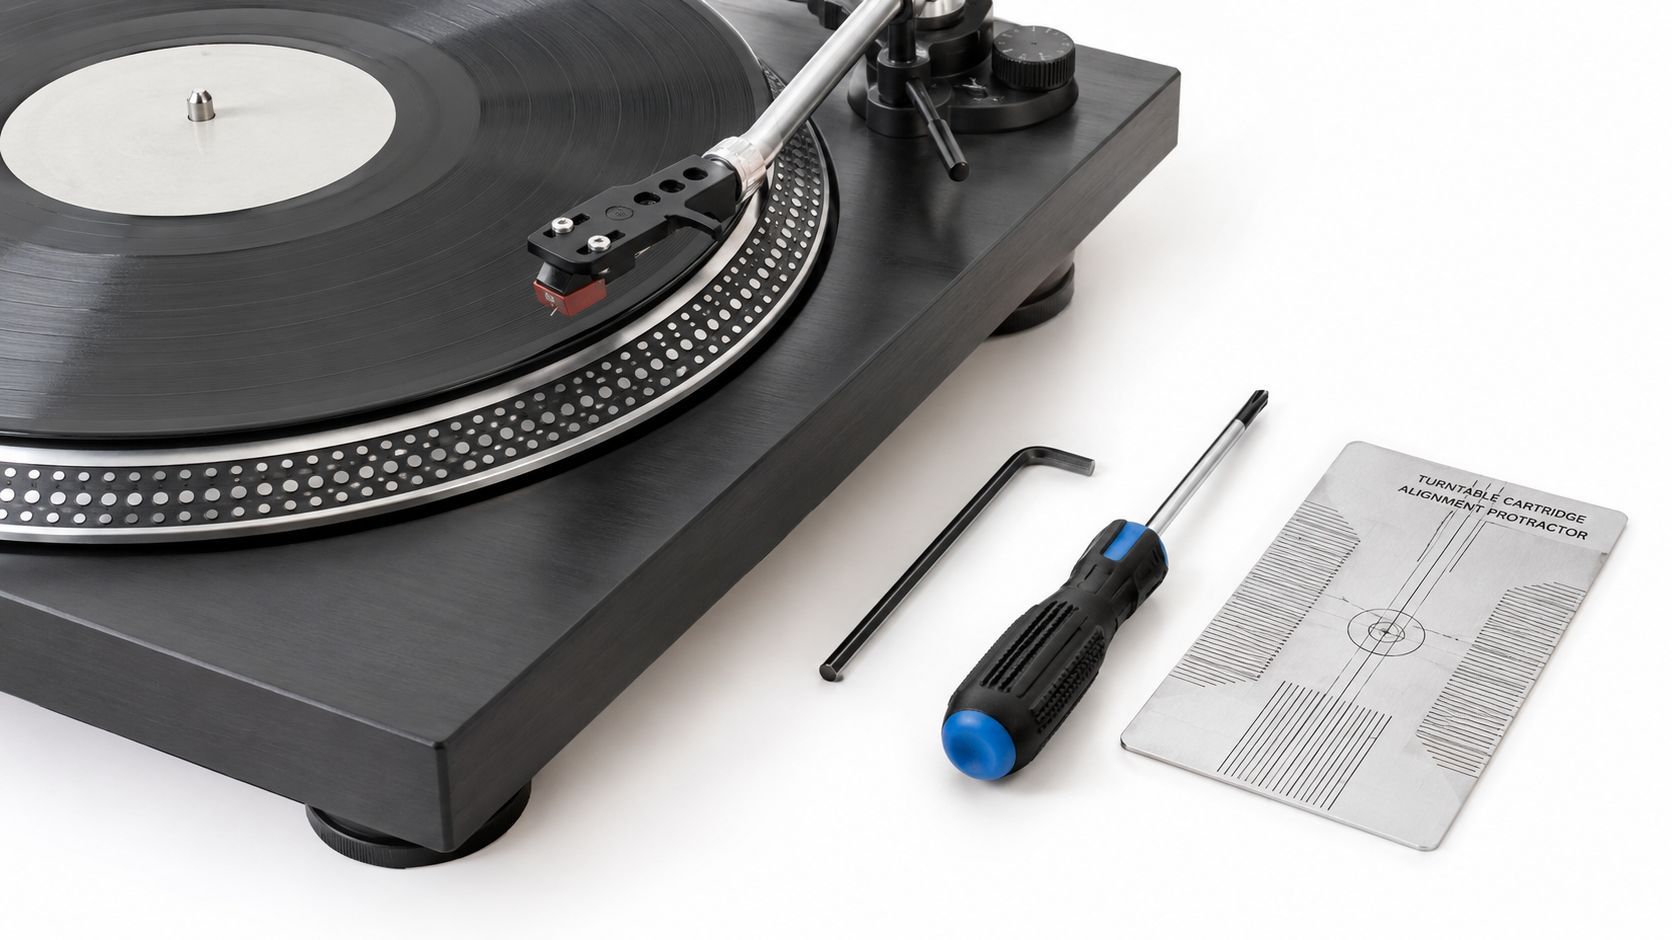
Make a record before making a change
If the headshell comes off with a bayonet or SME-style connector, remove it and place it on a clean, stable surface. Before loosening anything, photograph the cartridge from above and from the side. Marking its position can give you a useful fallback if the replacement becomes confusing, although the photograph isn't a substitute for proper alignment.
Use a small screwdriver that fits the mounting hardware cleanly. A good two-point protractor matters more than a fancy screwdriver. Add a stylus force gauge, fine tweezers, a magnifier or headlamp, and a soft cloth that keeps hardware from vanishing into the carpet.
If your turntable uses a built-in phono stage, identify its operating mode before reconnecting the system. The Supermarket Sound guide to phono preamps explains why the preamp must suit the cartridge type, particularly when moving between moving magnet and moving coil designs.
Inspect what the old install tried to hide
Look closely at the headshell and cartridge before anything moves. Check for bent terminal pins, oxidized leads, loose hardware, damaged insulation, cold solder joints, and a finger lift that has stretched or loosened at its mounting point. A new cartridge can't fix a weak connection upstream.
Don't pull the tonearm leads by the wire. Grip the connector with tweezers and work it free with controlled pressure. If a lead refuses to move, stop and inspect it. The wire is more delicate than the stubborn little terminal pretending to be indestructible.
Clean workspace. Covered stylus. Correct tools. No pets, sleeves, or enthusiasm near the cantilever.
Removing the Old Cartridge and Wiring the New One
Start with the headshell supported on the work surface. Loosen the mounting screws enough to release the old cartridge, but don't let the body drop or twist against the leads. Note the orientation of every wire before removal, then pull each connector straight from its terminal with tweezers.
The standard color mapping is:
| Lead Color | Channel | Polarity |
|---|---|---|
| White | Left | Positive |
| Blue | Left | Negative |
| Red | Right | Positive |
| Green | Right | Negative |
This is the standard arrangement for a conventional headshell, and the manufacturer documentation for a standard turntable cartridge wiring layout shows the same channel and polarity logic. The labels on the cartridge and the turntable manual win if they disagree. Color coding helps, but it isn't a license to ignore the hardware in front of you.
Remove without damaging the signal path
Pull the old connectors from the posts without twisting the posts themselves. Don't tug at the point where the lead enters the headshell or tonearm. If the installation uses soldered connections, remove the solder carefully and keep heat away from the cartridge body and cantilever assembly.
Before fitting the replacement, inspect the new terminal posts. If the lead connectors feel loose, gently tighten their grip with suitable tweezers. Don't crush them. A connector that slips off during alignment will waste more time than a careful inspection takes.
Fit the leads to the new cartridge in the correct order. If you need to prepare a bare lead, strip only what you need and tin it lightly. A mechanical wrap or secure contact is preferable to a heavy blob of solder. Excess heat can travel into sensitive cartridge components, and excess solder adds bulk without adding reliability.
Practical rule: If the connection needs a mountain of solder to stay put, the mechanical connection isn't doing its job.
Seat each connector fully, then position the cartridge in the headshell. Install the screws and nuts, but tighten them only until the cartridge stays in place. The body must still slide and rotate. Final tightening comes after alignment, not before.
The cartridge should feel secure, not imprisoned. You need movement for the geometry to work.
Alignment Is Geometry, Not Guesswork
Alignment solves three connected variables: overhang, offset angle, and null points. Overhang places the stylus at the correct distance from the spindle. Offset angle rotates the cartridge so the cantilever follows the intended path. Null points give you two positions where tracking error reaches zero under the chosen alignment system.
That is why a proper two-point protractor is the load-bearing tool. A fixed cartridge position, a paper gauge with vague markings, or a shell that looks parallel to the platter won't tell you whether the stylus reaches both null points. The Supermarket Sound cartridge alignment guide gives you a practical reference for the process.
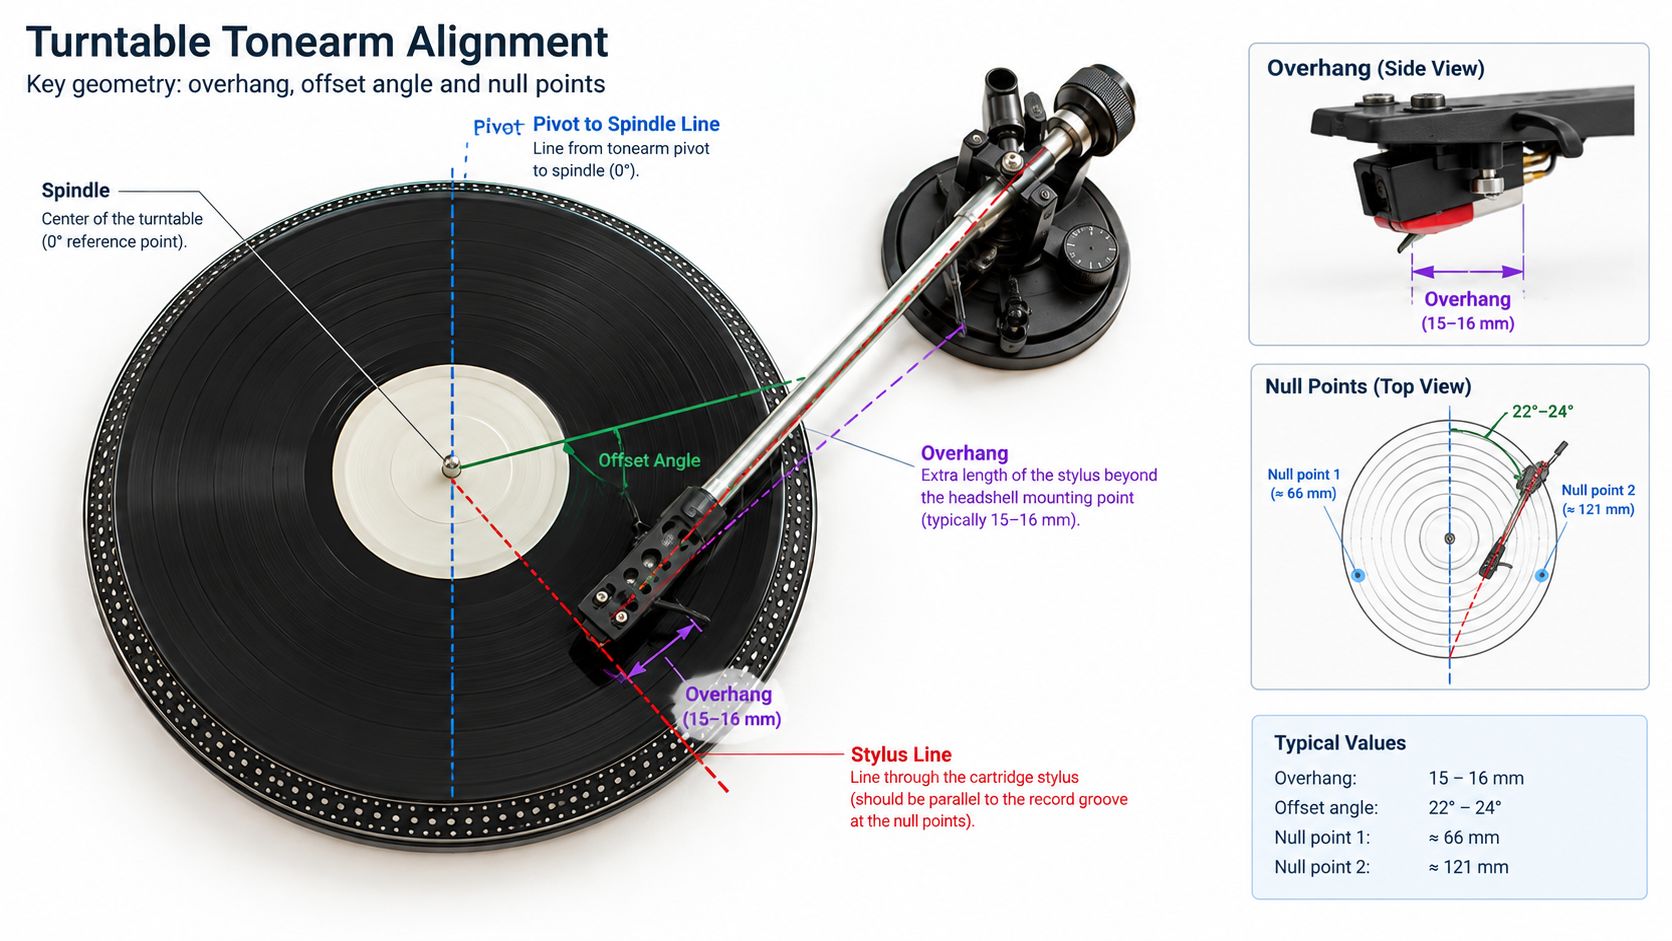
Place the protractor over the spindle and immobilize the platter so it can't rotate. Lower the stylus carefully onto the outer alignment point. Use the cantilever as the primary visual reference, not just the cartridge shell. Some shells are molded slightly off-axis, while the cantilever tells you where the stylus is actually pointing.
Work both null points
At the outer point, slide the cartridge forward or backward until the stylus lands exactly on the mark. Rotate the cartridge until the cantilever follows the printed grid. Don't chase the shell if the cantilever disagrees with it.
Move to the inner point and check again. If the stylus misses the inner point, adjust the cartridge and return to the outer point. This is a loop, not a one-pass gesture. Small changes in position affect both points, so keep alternating until the stylus reaches both and the cantilever stays correctly oriented.
After the first successful pass, tighten each screw gradually. Alternate between the screws and watch the cantilever while you tighten. The cartridge can rotate or slide under pressure, especially when the screws aren't perfectly matched to the headshell slots.
The video below shows the kind of visual relationship you're trying to establish between stylus, grid, and alignment geometry.
Don't confuse alignment with azimuth
Azimuth describes the cartridge's side-to-side angle relative to the record surface. If the cartridge leans, one channel can carry a different vertical relationship to the groove than the other. A mirror or azimuth block can help, but reflections can mislead when the cartridge shell and cantilever aren't perfectly aligned.
Check the cantilever first. Check the shell second. Tight screws last.
Tracking Force and Anti-Skate After the Swap
Alignment comes before final tracking-force calibration because later handling can shift the cartridge. Once the cartridge is secure, balance the tonearm according to the turntable's procedure. With the arm floating correctly, set the counterweight to the cartridge manufacturer's published tracking-force figure.
Use a calibrated stylus gauge rather than trusting the counterweight dial alone. The dial gives you a starting point. The gauge tells you what the stylus sees at record height.
Published ranges vary by cartridge family. The figures below come from the setup guidance collected in this cartridge selection and maintenance guide.
| Cartridge Family | Published VTF Range | Anti-Skate Start |
|---|---|---|
| Audio-Technica VM95 | 1.8 to 2.2 g | Begin near the tracking-force setting |
| Ortofon 2M Red | 1.6 to 2.0 g | Begin near the tracking-force setting |
| Nagaoka designs | 1.5 to 2.0 g | Begin near the tracking-force setting |
| Grado designs | 1.6 to 1.9 g | Begin near the tracking-force setting |
The manufacturer's range beats a round number every time. A force that's too light can produce mistracking, which sounds like fuzz, splash, or sudden hardness. A force that's too heavy increases the mechanical burden on the groove and suspension.
Set anti-skate as a starting point, not a religion
Set anti-skate near the chosen tracking-force value as an initial reference, then listen and measure with a suitable test record if you have one. Anti-skate isn't a magic equal number on every arm. Stylus profile, groove modulation, arm friction, and the individual cartridge all affect the result.
Watch channel balance and listen for unequal distortion. If one channel breaks up earlier than the other, don't immediately blame the cartridge. Recheck alignment, azimuth, tracking force, and lead connections before making a dramatic anti-skate adjustment.
Anti-skate is the trim control. It isn't the foundation.
The setup shouldn't end when the first record plays. After the cartridge has settled through normal use, measure tracking force again. Tonearm cable drag, headshell mass, and small shifts in the cartridge position can change the effective result.
A force gauge, not a hopeful glance at the counterweight, gets the final word.
Verifying With a Test Record
A test record turns vague suspicion into useful evidence. Cue the stylus onto a lateral tracking passage and listen for an even image between the speakers. A clean result should keep the left and right channels stable instead of making the vocal center wander as the groove becomes more demanding.
Listen for three things first. The stereo image should remain centered. Sustained tones should stay smooth rather than breaking into fuzz. Sibilance should sound like sibilance, not a spray of sand across the upper midrange.
Match the symptom to the adjustment
A buzz or roughness that grows with groove modulation often points toward anti-skate imbalance, but don't change that control blindly. Check the stylus position and tracking force first, then make a small adjustment and return to the same passage.
Smeared vocal consonants usually suggest mistracking or a stylus that isn't sitting correctly in the groove. A force setting that's too light can cause it, as can geometry that shifted when you tightened the mounting screws.
Distortion that appears loudly in one channel deserves special attention. It can point to alignment drift, azimuth error, a loose lead, or a damaged terminal. Channel-specific trouble isn't a reason to keep turning the anti-skate dial until the problem disappears by accident.
A test record won't diagnose every issue. It can't tell you whether the cartridge is a poor match for the tonearm, whether the phono stage suits the cartridge type, or whether a dirty stylus is clouding the result.
Let normal records make the final call
Play two or three full sides of familiar music before declaring victory. Choose records with vocals, sustained instruments, inner-groove content, and quiet passages. Your own collection reveals problems that an isolated test tone can hide.
Listen at a normal level. Don't chase microscopic changes by turning the system into a laboratory and your living room into a punishment chamber. The goal is stable tracking, clean channel balance, convincing space, and a cantilever that sits naturally in the groove.
Good setup sounds calm. Bad setup keeps announcing itself.
What You Are Really Buying
The cartridge is only one part of the signal chain. Tonearm bearings, phono preamp loading, cable capacitance, amplifier behavior, speakers, and the room all shape what survives after the stylus leaves the groove.
That makes the familiar upgrade logic backwards. A more expensive cartridge can't compensate for poor alignment. A new body won't repair a damaged stylus. A moving coil cartridge won't automatically improve a system whose phono stage doesn't support it.
The useful cascade looks like this:
- Alignment gives the cantilever the correct path through the groove.
- Tracking force places the suspension inside its intended operating window.
- Anti-skate helps maintain stable channel behavior across the record side.
- Azimuth keeps the cartridge's channel geometry under control.
- The room decides how much of the surviving information reaches your ears.
Miss the first step and everything downstream inherits the error. Miss tracking force and the stylus starves the signal or presses too hard into it. Ignore the room and you may spend money correcting a problem caused by placement.
I keep the Supermarket Sound guide to turntable cartridges close when choosing a replacement, but the buying decision is only half the judgment. Compatibility matters. So does the stylus condition. So does the arm. So does whether you can align the cartridge once it arrives.
A cartridge with a replaceable stylus may only need a stylus replacement. A damaged body, unknown compatibility, or a desired change in sound may justify replacing the complete cartridge. Don't buy a whole assembly because a worn stylus made the records sound dull.
The upgrade isn't finished when the cartridge arrives. It starts when the stylus meets the groove correctly.
Buy the protractor. Buy the force gauge. Use a test record if you have one. Those tools return more sound per dollar than climbing to the next cartridge tier.
Before ordering anything, identify your tonearm mount, cartridge type, phono-stage compatibility, and available stylus replacement. Then install slowly, align both null points, measure the actual tracking force, and listen through familiar records before making another purchase. That is how to replace a turntable cartridge without turning an upgrade into an expensive geometry lesson.

