The most overrated advice in vinyl care is the dramatic rescue clean. If your stylus only gets attention when it looks furry under a light, you're already listening through damage, not preventing it.
Turntable stylus cleaning isn't a fussy side quest for people who alphabetize inner sleeves. It's the load-bearing floor of analog playback. A dirty tip starves the signal before your phono stage, amp, or speakers ever get a vote, and no downstream upgrade fixes information the diamond never traced cleanly in the first place.
People love to talk cartridges as if setup begins and ends with alignment. It doesn't. Alignment matters, and if yours is off you should fix it with something like this guide to turntable cartridge alignment. But a perfectly aligned stylus dragging a speck of dust or vinyl shed through the groove is still feeding your system compromised information. That's where the spit on cymbals turns hashy, vocal sibilants get splashy, and the space between instruments folds inward.
This isn't really about scrubbing. It's about prevention. The habit that matters takes seconds, not solvents, and the safe method depends more on your stylus shape and cartridge construction than on whichever miracle bottle has the loudest product page.
Stylus care has been part of playback almost from the beginning. It shows up in the patent record with Thomas Edison's U.S. Patent 821,622, issued on May 29, 1906, and again with Patent 1,041,983, issued on October 22, 1912. By the time U.S. Patent 4,023,677 was filed on March 11, 1976 and granted on May 17, 1977 for a record-cleaning device with a detachable stylus brush, maintenance had clearly moved from improvisation to purpose-built routine, as documented in the historical Edison patent record.
Nothing about this is new. Just neglected.
Table of Contents
- Your Stylus Is the Floor and Dirt Starves Everything Downstream
- What to Use and What to Leave in the Drawer
- The Five Second Ritual That Actually Keeps Records Quiet
- When Dry Is Enough and When to Risk Wet or Gel
- How Often to Clean and How to Hear That It Worked
- Keep the Floor Clean and Let the Music Do the Rest
Your Stylus Is the Floor and Dirt Starves Everything Downstream
A stylus doesn't need to look filthy to sound wrong. It only needs enough debris stuck to the contact point to change how it rides the groove. That's why the audible symptoms arrive before the gross visual ones.
Tiny contact, big consequences
What listeners often call surface noise isn't always the record talking. Sometimes it's the stylus dragging yesterday's lint into today's session. The result isn't subtle in a good system, but it also isn't always spectacular. More often, it shows up as a flattening of tone and space. Hi-hats lose shimmer and become spray. A centered vocal gets less anchored. The image narrows.
That's the part people miss. Dirt doesn't just add noise. It steals shape.
A clean stylus traces transients with less smear, so snare hits have a firmer edge and acoustic strings keep their bite instead of turning papery. When the tip is carrying crud, downstream gear inherits that problem and presents it faithfully. Expensive gear can reproduce distortion beautifully.
Dirt at the stylus isn't housekeeping. It's signal loss at the first point of contact.
Prevention beats heroics
The common assumption is that stylus cleaning is an occasional deep-clean ritual. That's backwards. The useful version is a tiny, repeatable habit that keeps loose dust from becoming hardened buildup.
That shift matters because hardened buildup invites bad decisions. People push harder. They reach for wet cleaners first. They jab at the cantilever with whatever brush happens to be nearby. Then they blame analog for sounding temperamental.
A stylus is not where you improvise.
What works is boring. Good.
What to Use and What to Leave in the Drawer
A good stylus kit should limit your choices on purpose. The safer the cartridge, the less improvisation it sees at the front end.
Keep the daily tools simple
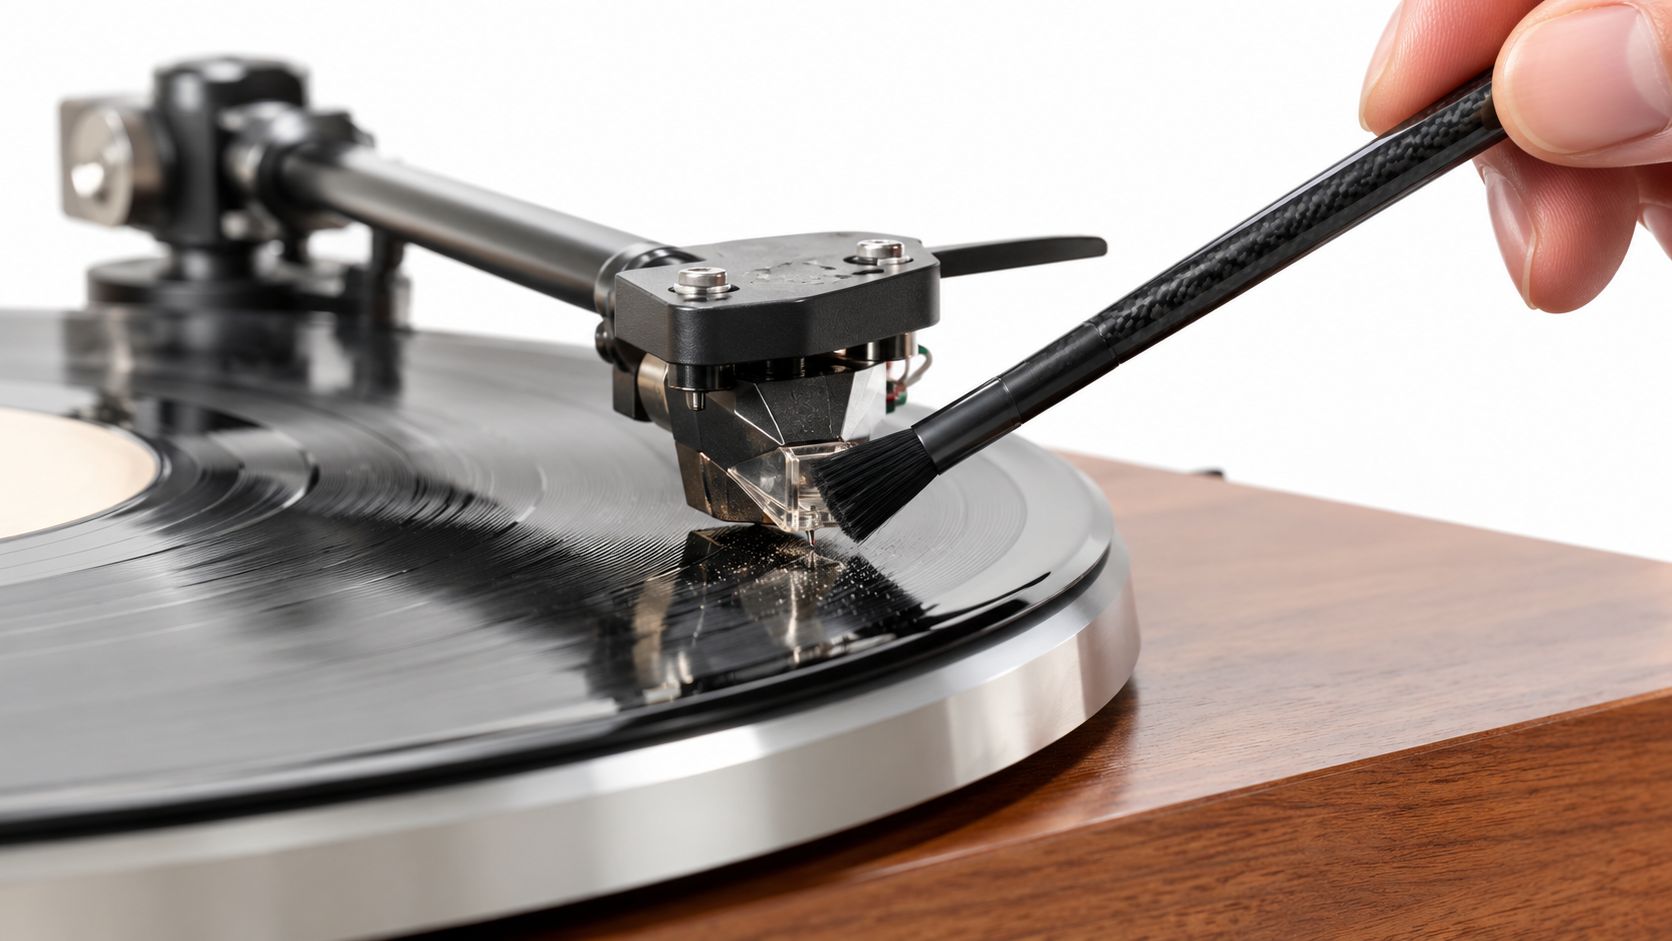
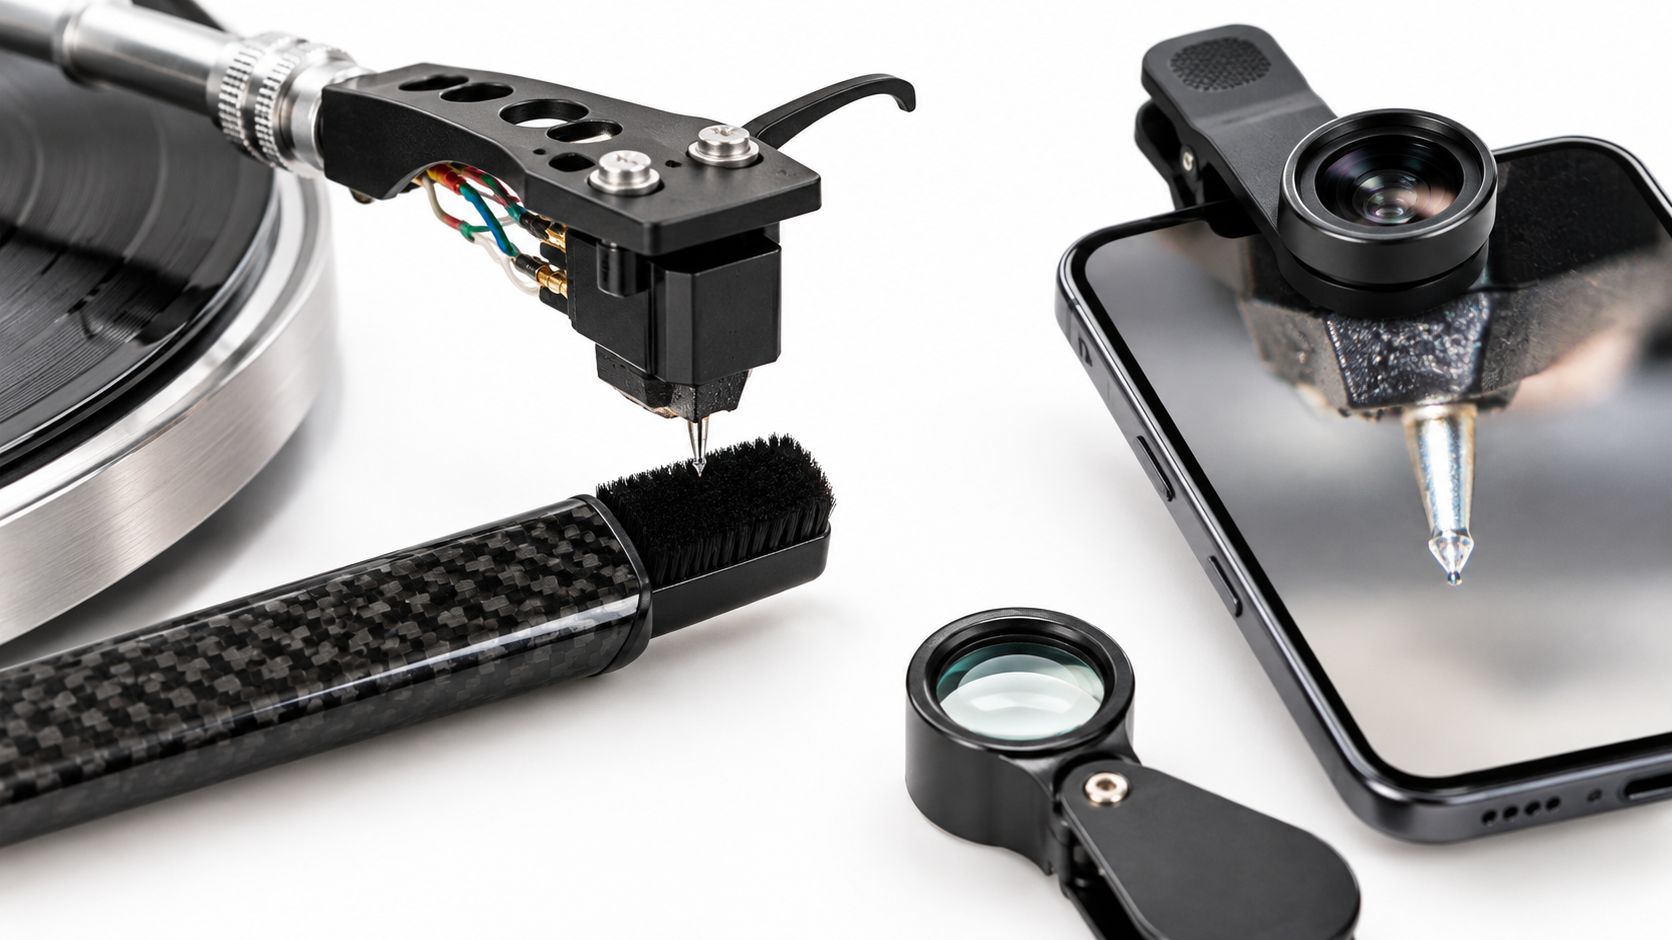
For routine cleaning, use a proper stylus brush with soft, fine bristles. It should barely touch the tip. If the brush asks for pressure, it is the wrong brush or the wrong technique.
A small magnifier helps more than people admit. A phone macro lens works too. The point is not gadget collecting. The point is seeing whether you are dealing with loose dust, a stubborn bit of fuzz, or baked-on residue that needs more care.
A gel pad can earn a place nearby, but only as a secondary tool. Some cartridge owners do well with it. Others are better off staying dry unless there is obvious buildup. Stylus shape and cartridge construction matter here. A beefier cantilever and a simple bonded tip can forgive more than a delicate nude profile on a low-riding cartridge.
Permanent plinth tool: Keep one proper stylus brush where your hand naturally lands before you cue a side.
Supermarket Sound has made the same basic point elsewhere. A soft brush is the right starting tool, and the table should be unplugged before any fussy hands-on cleaning.
Leave the junk drawer shut
Bad stylus cleaning usually starts with whatever is closest.
- Cotton swabs: They shed fibers and catch where you do not want drag.
- Compressed air: It moves debris unpredictably and gives you less control, not more.
- Household brushes, erasers, and random cleaning bits: They are made for other surfaces, with other tolerances.
The weak point is rarely the diamond itself. It is the cantilever and suspension around it. One clumsy pass can do more harm than a week of dust.
Match the tool to the design
This part gets skipped in a lot of stylus cleaning advice. It should not.
A basic conical stylus is usually less fussy to brush than a fine-line, Shibata, or other long-contact shape, because the contact edges are smaller and easier to clear with a light pass. More advanced profiles trace more information, but they also give grime more places to hang on. Cartridges with very exposed cantilevers also punish sloppy angles faster than chunkier DJ-style designs.
So the rule is simple. Use the least aggressive tool that can do the job on your specific cartridge. Dry brush first. Inspect. Only reach for gel or wet methods when the tip needs them.
What the right tool feels like
A proper stylus brush feels controlled and boring. The bristles glide. Your hand guides.
If the tool feels stiff, grabby, or vague, stop using it. Stylus cleaning should feel precise from the first touch, because that little five-second habit only works when the tool itself does not tempt you into overcorrecting.
The Five Second Ritual That Actually Keeps Records Quiet
Quiet playback usually comes down to a small habit, not a cleaning ceremony. The stylus is the first contact point in the whole chain, and if it starts the side with lint on it, everything after that gets worse.
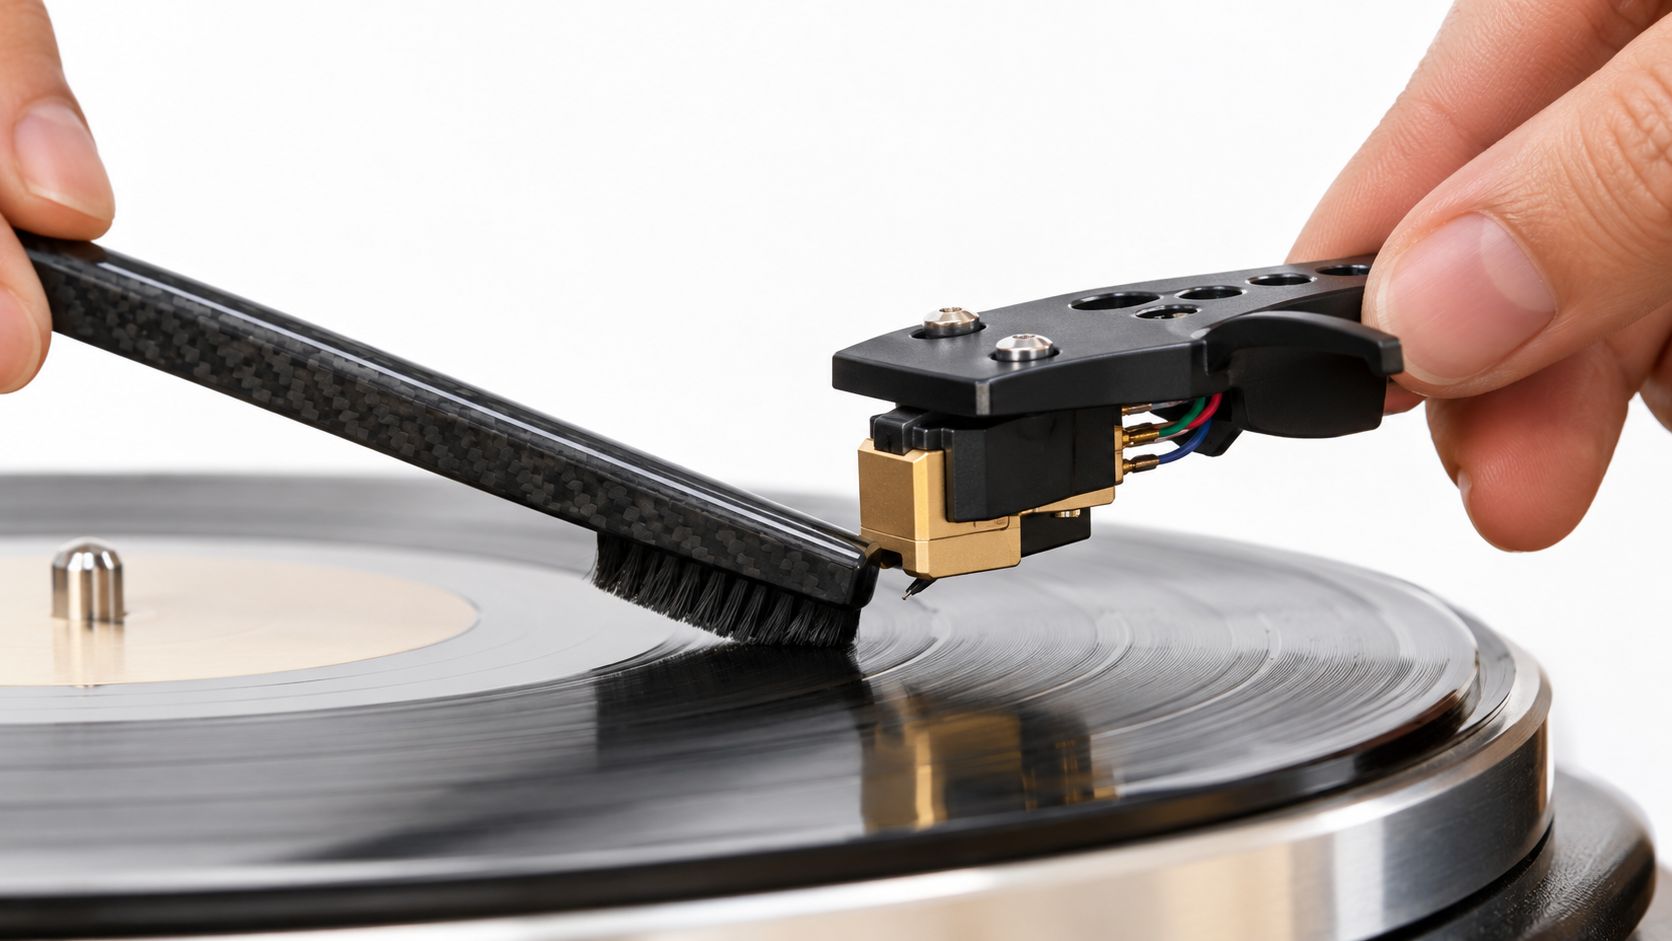
The routine is simple. Before the needle drops, give the stylus a light dry brush in the same direction it travels through the groove. It takes a few seconds, and that is why it works. Habits survive when they fit between record flips without turning into a project.
The motion that matters
Set the arm where the stylus is stable and easy to see. If your cartridge body gives you a safe place to brace a finger, steady it gently. Then bring the brush to the rear of the stylus and sweep forward, from back to front, with almost no pressure.
Two light passes will handle most loose dust. A third pass is fine if you can still see a bit of fuzz on the tip.
Direction matters because the weak point is not the diamond. It is the cantilever and suspension attached to it. Brush with the stylus, not against it, and keep the stroke straight. No side pressure, no upward poke, no urge to scrub.
Use a repeatable stroke. Force does not make the stylus cleaner.
What people get wrong
Stylus damage usually comes from one bad motion, not from careful routine cleaning. The common mistakes are predictable.
- Back brushing: pulling against normal travel loads the cantilever the wrong way
- Side swipes: lateral force is how alignment and cantilever problems start
- Upward jabs: the tip is tiny, the suspension is delicate, and nothing good happens fast here
A safe pass feels almost uneventful. That is the goal.
How this works in a real room
Before each side is the right cadence for most systems because it attaches to an action you already repeat. Record on. Quick brush. Cue down.
On a clean collection, that is often all the stylus needs day to day. On dusty used records, check the tip again after the first side because those discs can pack visible debris onto a fine-line stylus fast. That is the trade-off. The more revealing the stylus shape and the more exposed the cartridge design, the less sloppiness it will forgive.
This is not a deep-clean ritual. It is a five-second load-bearing habit that protects everything downstream, from groove contact to the noise floor.
When Dry Is Enough and When to Risk Wet or Gel
Dry cleaning covers almost everything. Wet and gel methods are for the moments when a stylus picks up debris a brush will not move, and the right choice depends on how exposed the cartridge is and how fine the stylus profile gets.
That distinction matters because the hazard is not "cleaning" in the abstract. It is putting extra contact, extra fluid, or extra repetition near a tiny suspension system that does not forgive sloppy handling. Some cartridge makers discourage fluids altogether, while others allow a very small amount if the stylus has stubborn residue, as explained in this cartridge cleaning safety guidance.
Dry first, because it solves the common problem
Dry brushing stays the default for one reason. It is the method people can repeat safely before bad habits creep in.
Loose lint, fresh dust, and the soft fuzz you get from normal play usually come off with a clean dry brush. No chemistry. No chance of liquid creeping toward adhesive joints or the suspension. If a stylus keeps coming up filthy, the problem is often upstream. A proper LP record cleaning kit will do more for noise and buildup than trying stronger stylus treatments every night.
Gel has a narrower job. It can help with clingy debris that stays put after a careful dry pass, especially on cartridges where brushing access is awkward. It still needs a light touch and a stable hand. Repeated dipping out of frustration is not safer just because it looks gentle.
Wet cleaning is the last step, not the smart-sounding default. I save it for hardened residue, and only if the cartridge maker allows it. Fine-line, Shibata, and other more revealing profiles pull more information from the groove, but they also give less margin for bad cleaning choices.
Choosing Your Cleaning Method by Situation
| Situation | Safest Method | Why It Fits |
|---|---|---|
| Routine pre-play dust | Dry brush | Fast, repeatable, and low-contact |
| Visible loose lint after a dusty record | Dry brush | Usually removes fresh debris without added risk |
| Stubborn visible buildup that a brush didn't shift | Gel pad | Low-contact option when debris is localized |
| Repeated grime on a stylus despite brushing | Record cleaning first, then dry brush | The stylus may be revealing an upstream problem |
| Delicate or expensive fine-line stylus with no visible crud | Dry brush only | Minimizes handling and avoids unnecessary contact |
| Hardened residue and manufacturer guidance allows fluid | Carefully applied wet clean | Reserved for cases where dry methods aren't enough |
Stylus shape sets the margin for error
A bonded conical or basic elliptical stylus usually tolerates routine handling better than a very fine contact shape on a light cantilever. That does not mean rough treatment is fine. It means the more exotic the stylus and the more exposed the cartridge body, the less experimenting makes sense.
Keep the hierarchy simple. Dry for routine care. Gel for isolated stubborn debris. Wet only for residue that calls for it, and only with cartridge-safe guidance. That is how a five-second habit stays protective instead of turning into a repair bill.
How Often to Clean and How to Hear That It Worked
Forget the hunt for a perfect schedule. The useful rule is simpler. Clean often enough that the stylus never has time to carry yesterday's dirt into today's side.
For routine listening, a quick dry pass before play keeps the habit load-bearing instead of turning stylus care into a weekend project. A closer look makes sense when you hear a change, see fuzz clinging to the tip, or notice the stylus coming up dirty again and again. Heavier intervention belongs to those moments, not to a calendar for its own sake.
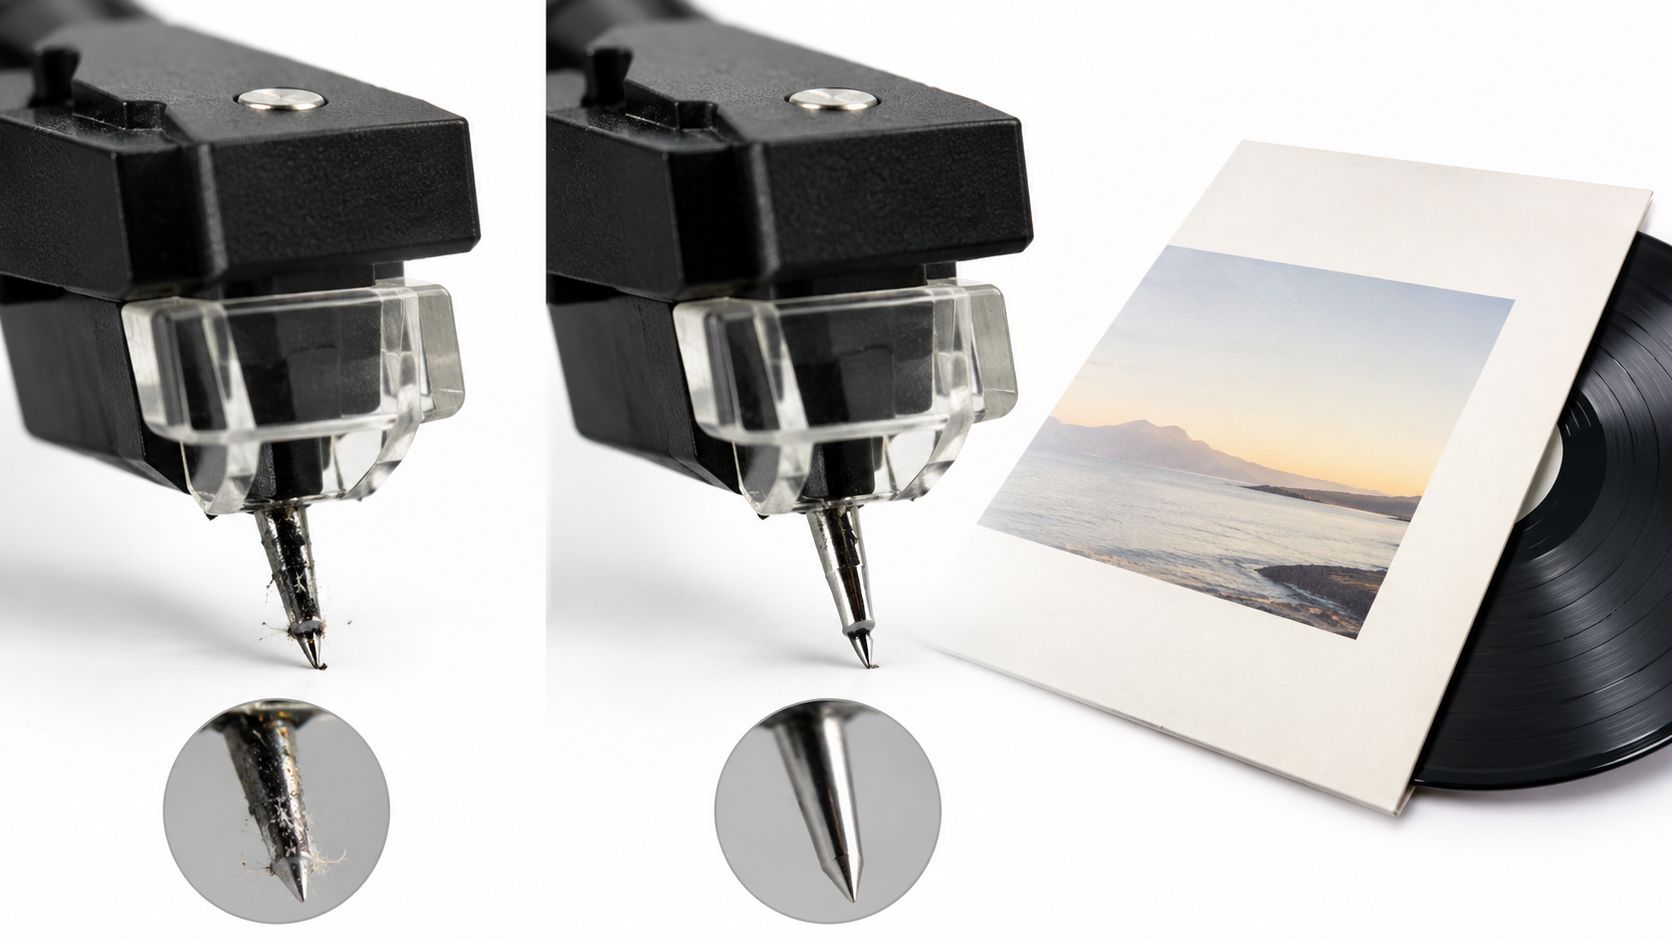
Hear the result in the next few seconds
A clean stylus usually announces itself fast. Cue a record you know well and listen for changes that are small but obvious.
- Less spit on vocals: "S" sounds stop spraying and settle back into the singer's mouth.
- Cleaner treble texture: Cymbals sound less sandy, more like metal.
- Better image focus: A centered vocal or snare stops wandering.
- Lower grit between notes: Surface noise may still be there, but the whole presentation feels less strained.
The giveaway is often ease. Music stops sounding like the cartridge is working through a film of dust.
If nothing improves, stop touching the stylus.
Look for proof, then blame the right thing
Your ears tell you something is off. Your eyes help confirm whether the cleaning solved the stylus part of the problem. Under magnification, the question is plain: is the debris gone, or is it still baked onto the contact area?
If the stylus looks clean and the sound is still edgy, the bottleneck has likely moved upstream or sideways. Dirty records can redeposit grime immediately. Misalignment, tracking force issues, groove wear, and damaged records can all mimic a dirty tip.
That is the trade-off people miss. Cleaning is a five-second habit that protects downstream sound, but it cannot fix setup errors or worn vinyl. It just removes one very common failure point at the floor of the system.
Keep the Floor Clean and Let the Music Do the Rest
The SEO version of this topic wants a miracle cleaner, a definitive ranking, and some fake swagger about secret audiophile technique. Real life is less glamorous and more useful.
Turntable stylus cleaning is not about chasing perfection. It's about not starving the signal at the first mechanical contact point. Once the diamond misses information or drags dirt through the groove, everything after it inherits the mistake. Your cartridge hands that to the phono stage. Your amp hands it to the speakers. Your room turns it into a larger problem.
The habit worth keeping
The one habit I'd keep even on a rushed night is the five-second dry brush before a side. That's the floor. Not heroic. Just load-bearing.
The one temptation I'd ignore is the urge to escalate because a bottle or gadget promises certainty. Most stylus damage doesn't come from neglect alone. It comes from nervous overcorrection.
A covered turntable helps, too. If dust is the recurring villain in your room, a good turntable dust cover solves more than another cleaning accessory ever will.
Taste over theater
Good analog playback always asks for a little discipline. Not obsession. A clean stylus doesn't make a mediocre record transcendent, and it won't rescue bad setup. What it does is remove a stupid, preventable bottleneck.
That's enough reason to care.
Brush lightly. Move in the right direction. Stop before the ritual turns stupid.
Then play the record.

