Most IEM fit advice starts with comfort and ends with tip size. That's backwards. IEM fit is an acoustic control surface, and comfort only tells you whether your ears are willing to tolerate the setting.
Insertion depth changes the sound. The seal between the nozzle and your ear canal forms part of the acoustic circuit. Break it and the bass leaves first. Push the nozzle deeper and the ear-canal resonance shifts, changing the treble balance before the driver has done anything different. The same IEM can sound full, smooth, and locked in, then thin and sharp after a careless reseat.
I'm Marque Hersh, founder of Supermarket Sound, and yes, I know “best ear tips” is the sort of phrase that keeps an SEO site alive. But the useful answer isn't another foam-versus-silicone sermon. It's a method for matching depth, seal, geometry, and pressure to your ears. Evaluate the fit by what reaches your eardrum, not by how tidy the IEM looks in a mirror.
Table of Contents
- Fit Is Not a Comfort Problem
- How Depth and Seal Change the Sound
- Foam vs Silicone and Picking the Right Size
- A Real Insertion Method That Seals
- Reading the Symptoms When Fit Goes Wrong
- The Edges Most Articles Skip
- Treat Fit as the Cheapest Upgrade You Own
Fit Is Not a Comfort Problem
A comfortable IEM can still sound wrong. Comfort is only one measurement, and it says little about whether the nozzle has created a stable acoustic seal.
If air slips around the tip, the IEM loses its acoustic load. Vocals, cymbals, and much of the midrange may remain convincing, which hides the error. The kick drum loses weight, the bass guitar recedes, and the presentation feels smaller and less anchored. The tip feels fine. The music does not.
Independent measurement guidance on IEM response and insertion depth explains why insertion matters. Deeper insertion generally makes an IEM sound bassier and can flatten treble peaks. Shallow insertion changes the ear-canal resonance, making the same earphone harsher or more sibilant. Fit is therefore part of the tuning, not a comfort checkbox.
The seal carries the load
A published comparison of insert earphones tested a deep fit, with the earplug's outer edge flush with the ear-canal entrance, against a shallow fit with only about 6 mm inserted. The deeper fit produced inter-aural attenuation roughly 15–20 dB greater than a supra-aural earphone in that comparison. The number will not transfer exactly to every IEM, but the principle does: insertion depth can change the acoustic floor beneath the entire presentation.
A seal that looks acceptable may still leak. A soft tip may still sit at the wrong depth. Every later judgment inherits that mistake.
Stop judging fit visually
Use a mechanical check:
- Seal first. Bass should arrive with body, not as a faint outline. Briefly press the IEM inward. If the low end suddenly fills in, the original seal was weak.
- Depth second. Move the IEM gradually and listen for changes in vocal presence, treble sharpness, and tonal weight.
- Comfort third. Reject any fit that creates pressure or pain, even if the sound initially improves.
- Stability last. Talk, chew, and turn your head. The seal should survive ordinary movement.
Check both ears independently. Canal shape and required depth often differ, so matching the visible angle is less useful than matching the sound and pressure. A fit that holds bass, keeps isolation steady, and avoids painful pressure has done its job. The eardrum gets the final vote.
How Depth and Seal Change the Sound
IEM fit is an acoustic control surface, not a comfort checkbox. The seal controls the air volume between the nozzle and the eardrum. A leak gives low-frequency energy an escape route, while the midrange may remain convincing enough to make you blame the driver or recording.
The test is immediate. Press the IEM slightly deeper. If the bass suddenly gains body, the original seal was weak. Move the nozzle inward gradually. If treble becomes more pointed, you have changed its relationship with the ear-canal resonance.
Depth is part of the tuning
The ear canal's resonance typically falls around 7–10 kHz. Measurement practice often targets an approximately 8 kHz resonance point for consistency, according to practical IEM measurement guidance. A shallow fit shifts that resonance downward, which can make upper treble feel more aggressive or sibilant. A deeper fit generally moves the peak away, often producing a bassier, smoother impression.
Deep-insertion designs make this relationship hard to ignore. Older hearing-acoustics literature describes standardized deep earplug insertion at about 15–16 mm past the ear-canal opening. ER4-style triple-flange tips have been described as extending roughly 10–15 mm into the canal in this review of the ER4 fit. Those figures do not make deep insertion correct for every ear. They show why insertion depth belongs in any serious tuning discussion.
| Fit Variable | Frequency Region Affected | Typical Change | What You Hear |
|---|---|---|---|
| Loose or leaking tip | Low frequencies | Bass energy escapes | Thin kick drum, weak sub-bass, smaller image |
| Shallow insertion | Canal resonance and bass transition | Resonance shifts downward | Harsher treble, more sibilance, less weight |
| Deeper insertion | Bass and upper-treble balance | Seal improves and treble peak can flatten | Fuller low end, smoother presence, tighter image |
| Bore or geometry mismatch | Across the response, especially bass and treble balance | Seal and acoustic path change | Uneven tone, inconsistent isolation, unstable imaging |
Driver type sets the ceiling for what fit can achieve. A dynamic driver and a balanced armature behave differently under a leaking seal, as explained in this comparison of dynamic drivers and balanced armatures. Neither can compensate for air escaping at the nozzle.
Check each ear independently. Canal shape and required depth often differ, so matching visible angles matters less than matching bass, pressure, and stability. Fit changes the signal before the diaphragm gets blamed.
Foam vs Silicone and Picking the Right Size
Tip material matters, but it's not a religion. Silicone gives me the cleaner starting point for most listening because it preserves the IEM's character, swaps quickly, and stays consistent when the size and geometry match my ear. Foam earns its place when the canal is irregular, the environment is loud, or the IEM's treble needs a little restraint.
Silicone seals through pressure against the canal wall. It's easy to clean and tends to give a repeatable fit across sessions. Its weakness is unforgiving geometry. If the size misses your canal, the material won't magically fill the gap.
Foam works differently. Compress it, insert it, and let it expand. It conforms to uneven walls more readily and can make a bright monitor sound warmer by reducing some high-frequency energy. That makes foam useful with a sharp IEM, during a noisy commute, or when jaw movement repeatedly breaks a silicone seal.
Choose by failure mode
| Situation | Start With | Why |
|---|---|---|
| You want a clear, repeatable baseline | Silicone | It's easy to clean, swap, and compare |
| Your IEM sounds thin despite a decent insertion | A larger silicone size | More contact can close the leak |
| The canal shape feels irregular | Foam | Expansion can accommodate uneven walls |
| A bright monitor produces hard sibilants | Foam | Its material can soften the upper balance |
| One ear seals while the other slips | Different sizes by ear | Anatomy doesn't follow the medium-tip fantasy |
| Silicone seals but creates pressure | Smaller size or foam | You need contact without a hotspot |
Size mistakes leave recognizable fingerprints. Too small, and the tip leaks, slips, or forces you to push the nozzle deeper than intended. Too large, and it creates pressure, sits at an awkward depth, or fatigues the outer ear. The right size holds without constant pressure.
A hybrid setup can work beautifully. Foam on a bright monitor can tame treble without sacrificing the physical hit of a sealed bass response. That's a more useful recommendation than declaring one material universally superior. My beginner's guide to in-ear monitors covers the broader IEM hardware picture, but fit remains the part you can change fastest.
Pick the tip that fixes the symptom.
A Real Insertion Method That Seals
Start with the ear, not the IEM. Pull the outer ear gently upward and backward to straighten the canal, then roll your jaw or yawn once. That small movement settles the cartilage and gives the tip a cleaner path.
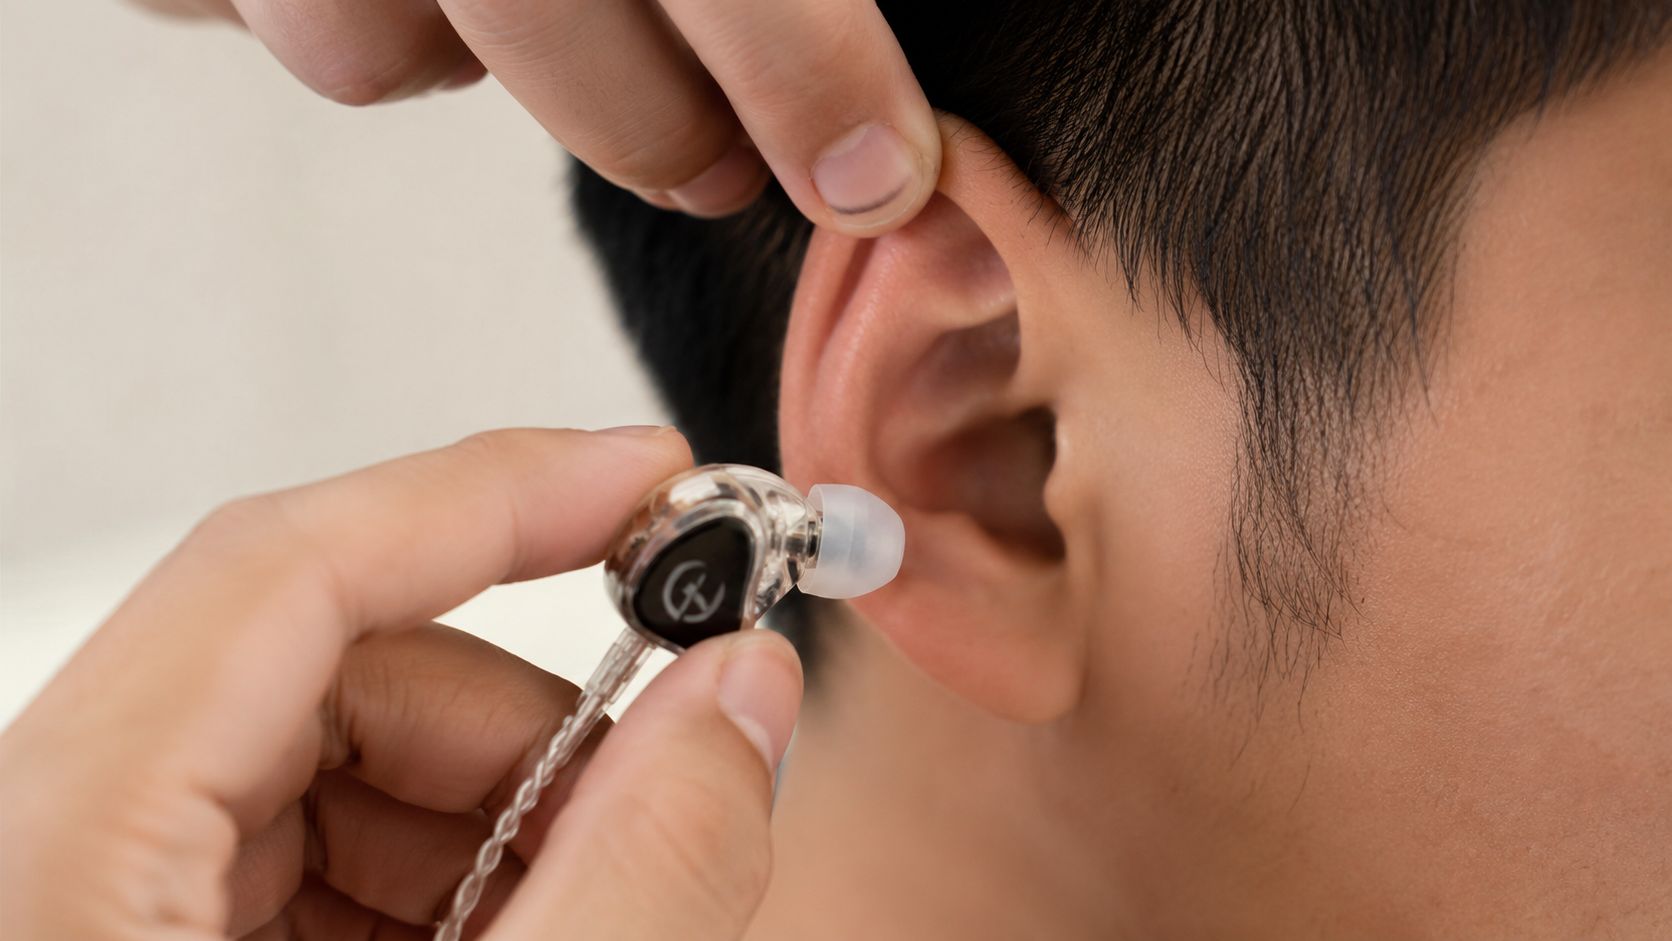
With silicone, don't ram the IEM straight inward. Twist it as you insert, letting the body pivot around the stem while the tip flare finds the canal wall. The housing should rest at a slight forward angle rather than grinding into the concha.
Aim for the nozzle to sit roughly 2–4 mm past the tragus. That gives the tip enough contact to seal without turning insertion depth into a pain contest. Correct depth means airtight and comfortable, not maximum penetration.
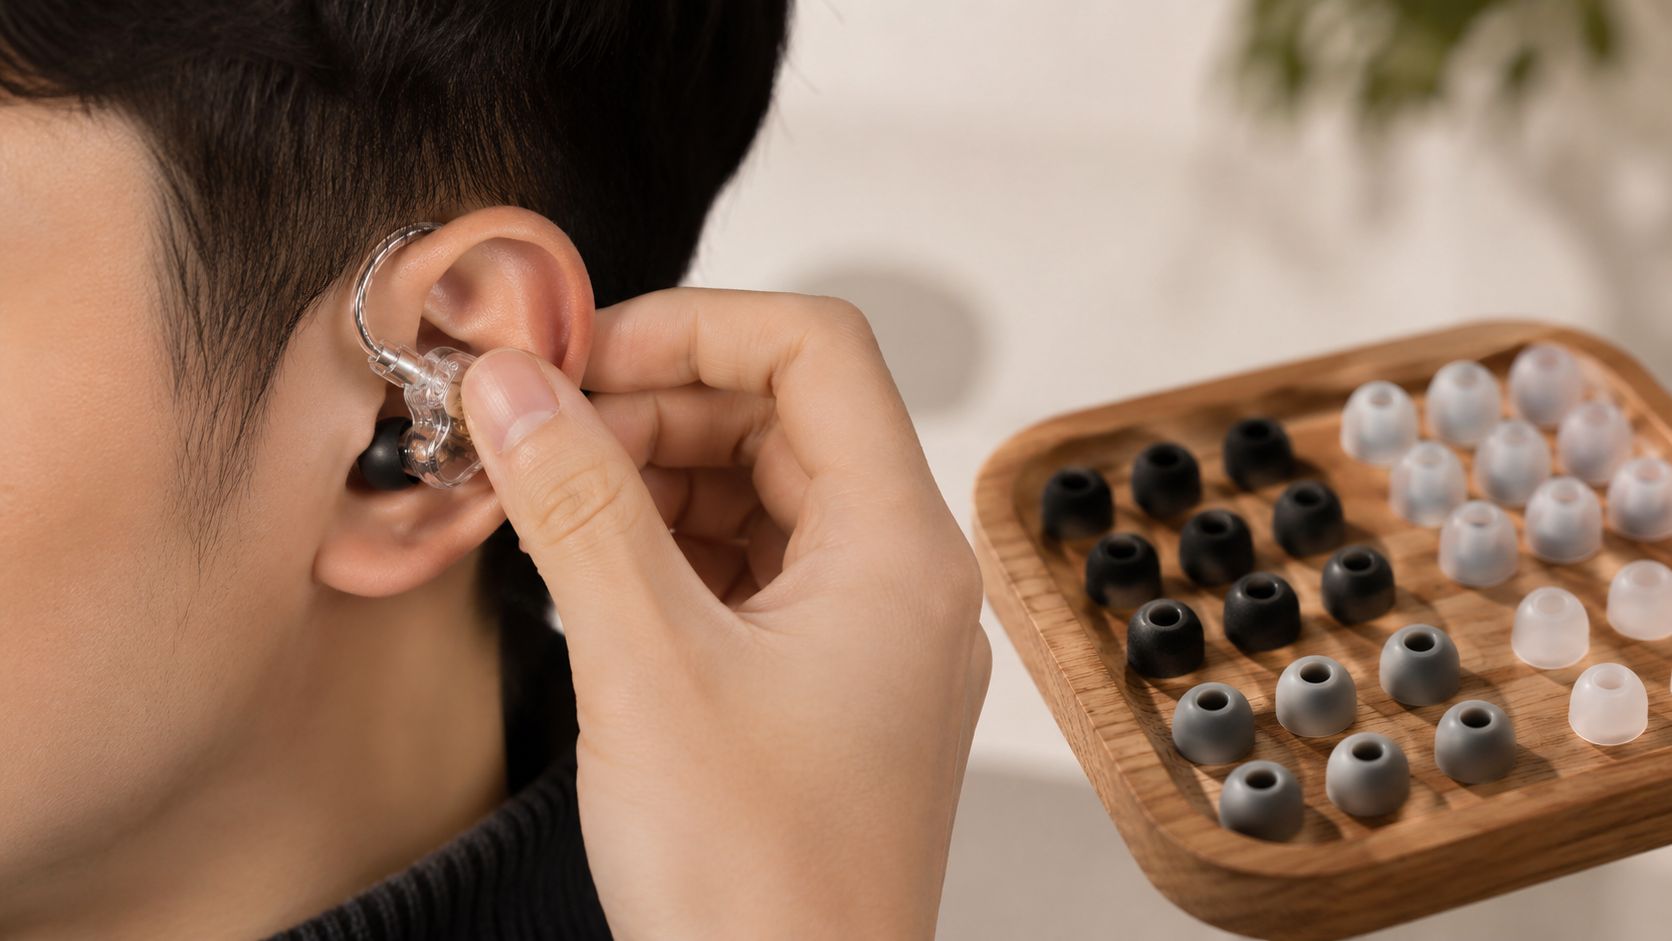
Foam needs patience. Compress it fully, insert it shallowly, and hold the IEM still for 10–15 seconds while the foam expands against the canal walls, as described in this foam and silicone insertion guide. Rushing this step makes foam sound thin and quiet because the material hasn't finished sealing.
A simple check follows. Cup your hand over the ear and listen for the ambient noise to collapse. Then play a familiar bass-heavy track and compare the weight with your reference fit. Gently tug the earlobe. If that changes the sound dramatically, the seal still needs work.
For a visual demonstration of the motion, use the IEM insertion video.
The goal is stable pressure, not force. Let the tip do its job.
Reading the Symptoms When Fit Goes Wrong
Fit failures sound like equipment failures because the same driver can produce radically different results in a leaking canal. Don't reach for EQ first. Change the hardware relationship between tip and ear.
Thin low end almost always points to a leak. Start with a larger tip size, then reseat it without pushing deeper. If the bass returns when you press the housing inward, you've diagnosed the problem.
Harsh treble usually points in the other direction. The tip may be oversized, or the nozzle may have moved too deep and shifted the ear-gain resonance upward. Start by reducing insertion depth. If that doesn't settle the peak, move down a tip size.
| Symptom | Likely Cause | First Fix |
|---|---|---|
| Thin or rolled-off bass | Leak at the nozzle, often from a small tip or shallow seating | Increase tip size |
| Harsh treble or sharp sibilance | Excessive depth or oversized tip | Reduce insertion depth |
| Weak isolation | Geometry mismatch or incomplete seal | Change tip size |
| One side sounds weaker | Left-right seal mismatch | Change the tip size on the quieter ear |
| Hotspot after a long session | Pressure from stiff silicone or compressed foam | Change material |
| Sound changes while talking or chewing | The fit shifts with jaw movement | Reseat the IEM, then alter size if needed |
Weak isolation often means the tip shape doesn't match the canal. A round-bore tip can struggle against an oval canal even when the diameter seems close. Change the size before changing the entire IEM.
Comfort hotspots need a time-based diagnosis. If pain appears after the fit has sounded stable, pressure has accumulated somewhere. Change material after you've checked size and depth. The body of the IEM may also be pressing the concha, but don't use a new cable or EQ to solve a tip problem.
Listen for the symptom. Fix the mechanism.
The Edges Most Articles Skip
Most fit guides assume both ears received the same mould, yet left and right canals differ in shape, depth, and tolerance. Treat each ear as its own fitting problem. Different tip sizes are normal, not evidence that you chose badly.
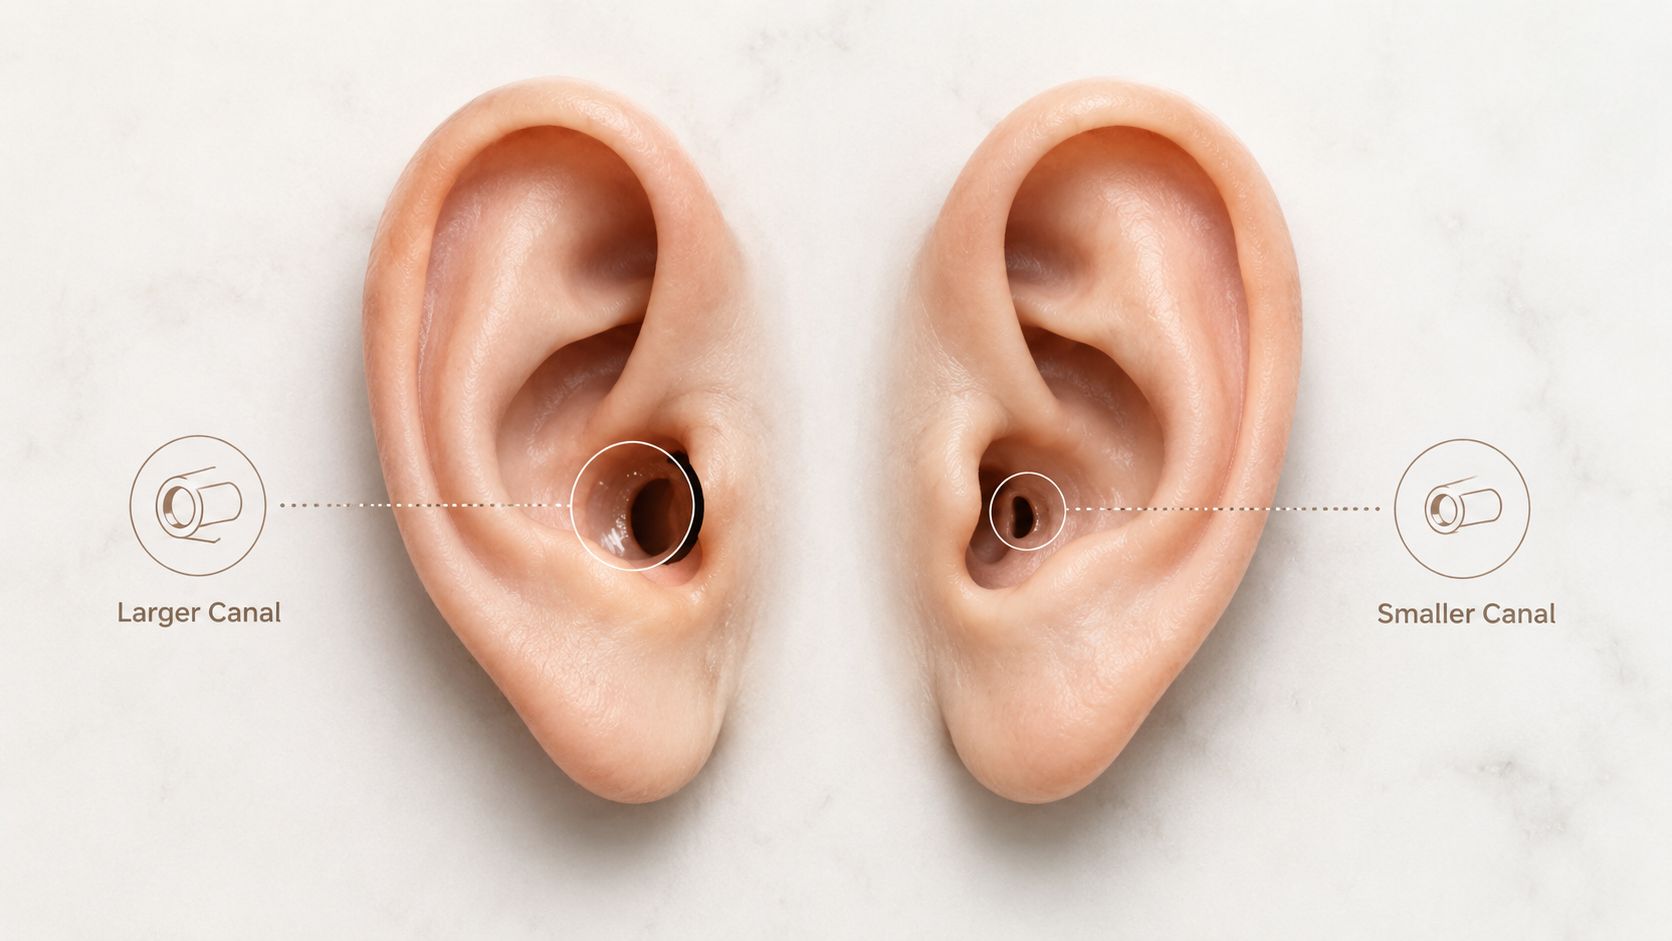
An unequal seal changes more than bass. It shifts channel balance and your sense of space, so a lopsided fit can collapse the soundstage even when the recording is fine. For a broader explanation of that effect, see this guide to soundstage in headphones. Fit the quieter or weaker side independently, then compare both ears with centered vocals and steady low frequencies.
Time exposes bad geometry
A fit can feel right at insertion and become irritating later. Cartilage and soft tissue respond to pressure, while jaw movement can gradually move the nozzle from its original position. Independent ergonomic guidance also supports the point that use conditions and product size affect comfort and fit perception, as discussed in this ear-tip ergonomics guide.
Recheck the seal after 30 minutes during a long session. If the bass has thinned or one ear feels pressurized, reseat the IEM before touching EQ. A fit that survives one song but fails during a work block is not a successful fit.
Use an objective check when available
Comfort cannot confirm a seal. Use an objective check when your device provides one. The built-in Ear Tip Fit Test on compatible devices checks whether the canal seal is proper, and the manufacturer's Ear Tip Fit Test guidance explains how to run it before you trust the acoustic result.
Hearing-device measurements apply the same principle more precisely. Real-ear occluded and unaided responses can be compared, while leakage measures such as REOG quantify escaping low-frequency energy. You do not need laboratory equipment to apply the lesson. Run the available seal test, then verify the result with familiar music.
If no test exists, compare the IEM's isolation with a foam earplug held to the ear. If the IEM does not block more low-frequency rumble than that reference, suspect the seal.
Material choice comes later. Anatomy sets the result.
Treat Fit as the Cheapest Upgrade You Own
Before buying a new IEM, fix the one already in your drawer. A modest tip change and careful depth adjustment can alter the perceived response more than a driver upgrade because fit changes the acoustic load before the signal reaches the diaphragm. The exact price of the replacement matters less than whether it closes the leak without creating pressure.
Take one familiar IEM and run a controlled comparison. Use silicone and foam, test each at two sensible depths, and keep the track constant. Use an Ear Tip Fit Test if your device supports one. Otherwise, choose music with obvious sub-bass, centered vocals, and a treble passage you know well.
Write down what changes:
- Bass weight: Does the kick drum gain body, or merely become louder?
- Vocal position: Does the singer stay centered when you move your jaw?
- Treble texture: Does the edge soften, or does detail disappear?
- Comfort over time: Does the fit remain tolerable after a full listening block?
Don't buy a new monitor to cure thin bass until you've tested the seal. Don't blame the tuning for shouty treble until you've tested depth. Gear shopping feels productive, but it often just moves the same anatomical problem into a more expensive shell.
I publish broader listening and gear guidance through Supermarket Sound, but the first upgrade remains mechanical.
Fit is not a hygiene afterthought. It's a tuning tool.
Take one IEM you already own tonight, test both ears separately, and compare tip size, material, and insertion depth with a familiar track. Keep the setup that seals, stays comfortable, and sounds stable after the session has gone long. That's the fit you should trust.

