
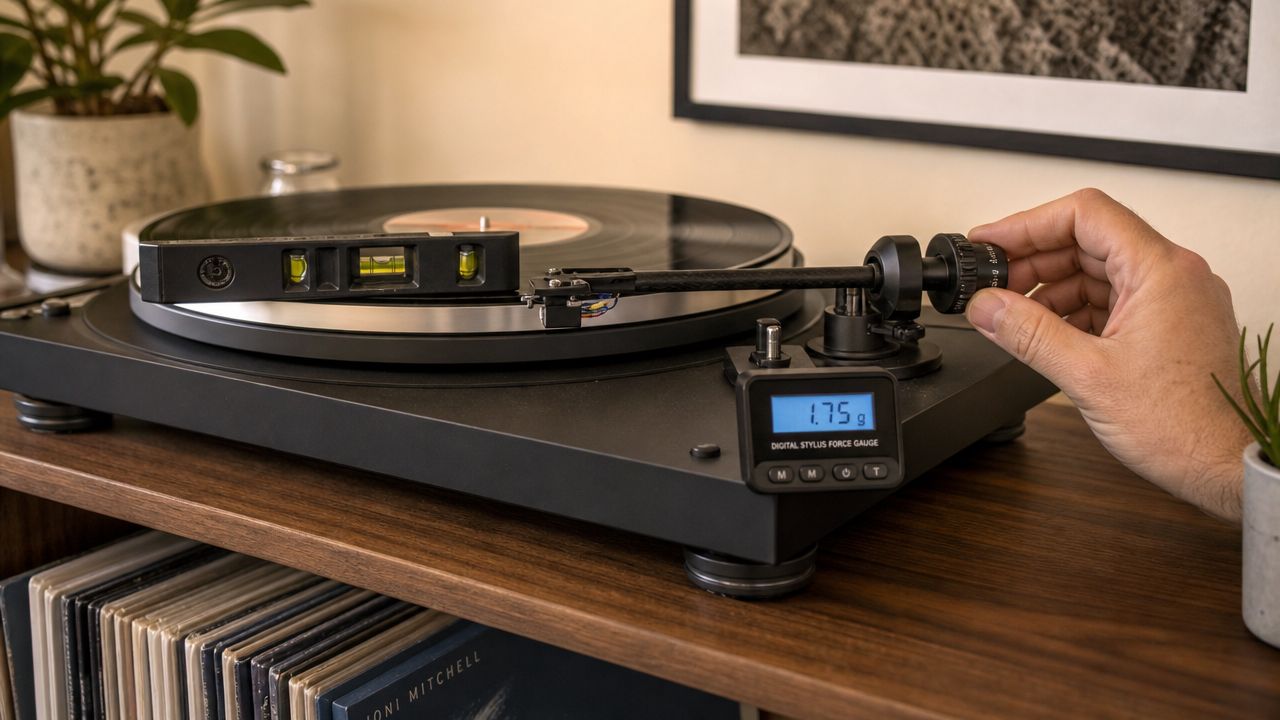
A lot of beginner turntable advice gets the priority backwards. People obsess over cartridges, mats, and upgrade paths before they've done the three load-bearing things that decide whether the deck will sound like music or like a small mechanical argument.
I've set up enough turntables to know this: the table you bought is not the finished product. It's a kit. The complete instrument is the one you build when you level it, feed the signal properly, and set the arm so the stylus rides the groove the way it was meant to. That's the whole game in turntable setup for beginners. Not box-checking. Tuning.
Table of Contents
- The Most Expensive Turntable Is a Cheap One Set Up Poorly
- Your Setup Is Only as Good as Your Shelf
- The Phono Stage Is Not an Optional Accessory
- Aligning the Cartridge Is Where the Magic Happens
- Tracking Force Is a Law of Physics Not a Suggestion
- Your First Spin Is a Diagnostic Tool
The Most Expensive Turntable Is a Cheap One Set Up Poorly
A bad setup turns any turntable into a record grinder. Not a premium one. Not a budget one. Any one.
That's why I roll my eyes when someone asks whether they bought the “right” beginner deck before they've even checked whether the thing sits level or whether the arm is balanced correctly. The purchase matters. The setup matters more. Your budget buys the parts. Your patience decides whether those parts behave like a hi-fi or a furniture prop.
There's a reason this matters beyond forum nitpicking. 52% of new buyers start with a beginner turntable under $300, and 90% of those novices fail at the critical setup steps of cartridge alignment, tracking force, and levelness. That's the quiet trap in vinyl's comeback. Entry is easy. Good sound isn't.
Three things carry the whole system
If you're new, stop trying to master every tweak on day one. Get these load-bearing pieces right:
- A stable, level platform: If the deck rocks, the stylus reads that instability along with the music.
- A correct signal path: If the cartridge signal isn't amplified and equalized properly, the whole system starts starved and wrong.
- Correct tracking force: If the stylus pressure is off, you're not just hurting sound. You're hurting records.
Everything else sits on top of that floor.
My rule: Don't spend your first week chasing flavor. Chase correctness.
Beginners get spooked because setup sounds fussy. It isn't, at least not at the level that matters. You do not need monk-like serenity, a lab coat, or a shrine to analog purity. You need to respect that vinyl playback is mechanical and electrical at the same time. Tiny errors become audible fast.
Your ears matter more than marketing
I've heard humble setups lock into place and sound grounded, spacious, and alive because the basics were done properly. I've also heard expensive decks sound thin, smeared, and weirdly nervous because somebody treated setup like optional admin.
That's the thesis. Not better gear first, but better setup first.
Do that, and the rest gets interesting.
Your Setup Is Only as Good as Your Shelf
Bad support ruins good gear faster than beginners expect. A turntable is built to read microscopic groove movement. If the shelf moves too, the stylus reads that movement as part of the signal.
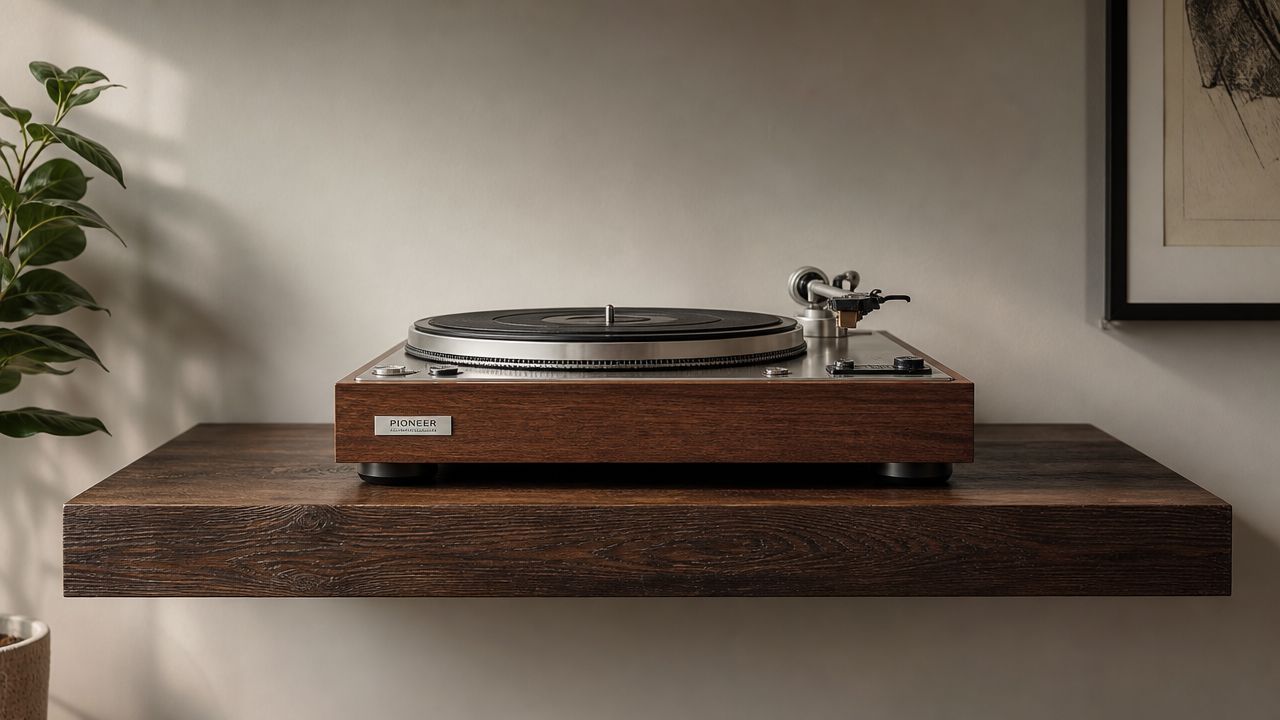
Start here before you touch upgrades, mats, weights, or isolation gadgets. The shelf is one of the few load-bearing parts of the whole setup. Get it wrong and every other fix is smaller than it should be.
Vibration Is Signal Contamination
The stylus cannot tell the difference between music in the groove and vibration coming up through the furniture. That is the whole problem.
Put the turntable on a flimsy shelf, a resonant cabinet, or the same surface as the speakers, and the deck feeds on energy it was never supposed to track. You hear the result fast. Bass gets thick and blurry. Stereo image softens. Loud passages can trigger feedback or a skip because the cartridge is fighting both the record and the room.
Use boring furniture with some mass and rigidity:
- Choose a heavy, stable surface: A solid cabinet beats a lightweight display shelf.
- Test for flex: Press on the shelf. If it wobbles, twists, or rings, reject it.
- Keep the speakers off that surface: Physical separation solves a lot of problems cheaply.
If you want the bigger picture on speaker and system placement, the home audio setup guide for room and gear positioning covers that without turning your house into a lab.
Level Is Mechanical, Not Decorative
A turntable that is out of level pushes the tonearm off balance. Gravity starts pulling sideways, not just down. That changes how the stylus sits in the groove and how evenly it loads each channel wall.
Use a small bubble level on the platter. Check side to side, then front to back. Adjust the feet. If there are no adjustable feet, shim under the turntable or under the furniture until the platter is flat.
Do not overcomplicate this.
You are not chasing perfection. You are removing a basic mechanical error so the cartridge can do its job properly.
Footfall matters too. Suspended floors, hallway traffic, and cheap shelving can all send enough energy into the deck to cause mistracking. If someone walking through the room makes the stylus flinch, fix the support before you blame the cartridge.
A stable, level shelf costs little. It improves more than a lot of popular upgrades.
The Phono Stage Is Not an Optional Accessory
A lot of “vinyl sounds bad” complaints have nothing to do with the turntable itself. The problem is gain and equalization. The cartridge is producing a tiny electrical signal, and if you feed that raw signal into the wrong input, the rest of the system never gets a fair shot.
The Cartridge Signal Needs Gain and RIAA EQ
A phono cartridge does two unusual things at once. It outputs a very low-level signal, and it expects the playback chain to reverse the EQ used when the record was cut. Without that correction, bass drops away, treble jumps forward, and the whole presentation gets thin and sharp.
That is the job of the phono stage. It adds the right amount of gain and applies the RIAA equalization curve so the signal arrives at your amplifier in a form it can use.
Get this wrong and nothing downstream can fix it.
What to Use in a Real System
Keep the routing simple:
| Situation | What to do |
|---|---|
| Turntable has a built-in preamp | Turn the preamp on and use a standard line input on the amp or powered speakers |
| Amplifier or receiver has a PHONO input | Leave the turntable's built-in preamp off and plug into PHONO |
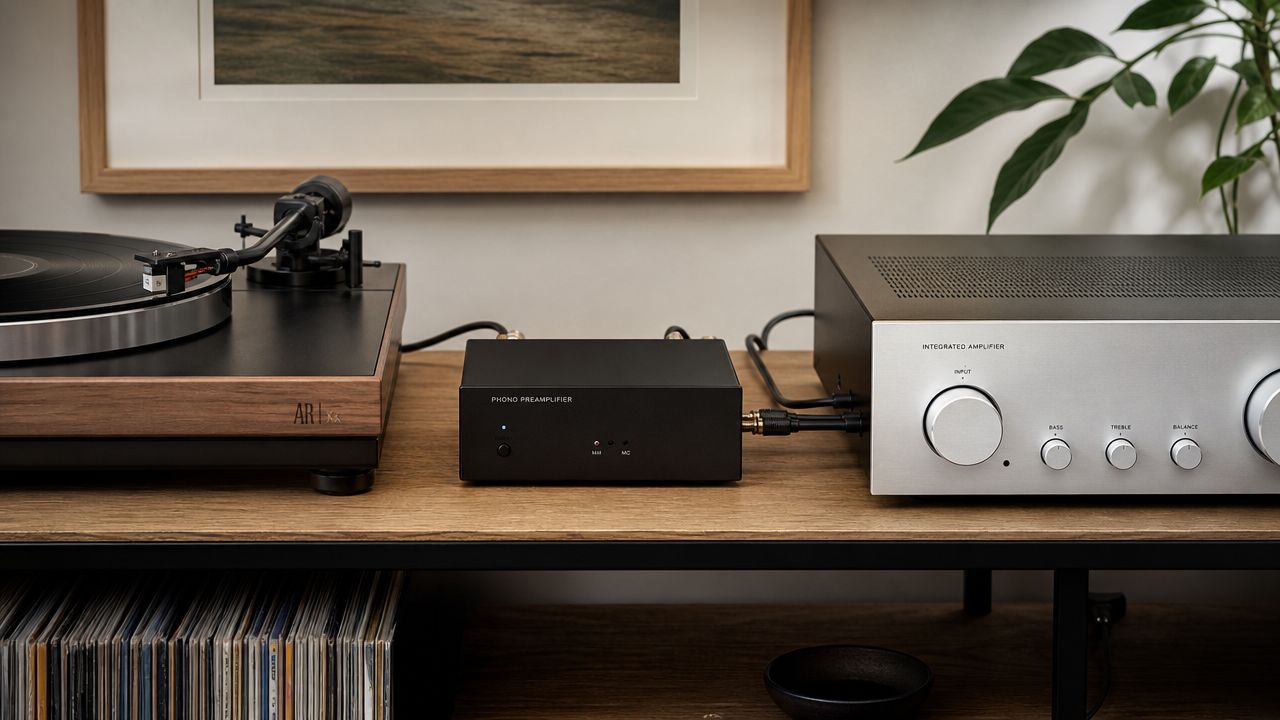
| Neither has phono support | Add an external phono preamp between the turntable and amp |
If you want the plain-English version of how these pieces fit together, read the guide to phono preamps and vinyl signal chain basics.
One mistake matters more than beginners expect. Do not run a turntable with its built-in phono preamp turned on into a PHONO input. That means the signal gets amplified and EQ'd twice. The result is usually loud, smeared, and wrong.
The ground wire matters too. It is not decoration. If your turntable and phono stage, or your turntable and amplifier, have ground terminals, connect them securely. A loose or missing ground often shows up as steady hum before anything else.
Use the symptoms to diagnose the chain fast:
- Very low volume: the cartridge signal is hitting a line input without phono gain
- Thin, bright sound: the RIAA correction is missing
- Bloated, harsh sound: you are probably running one phono stage into another
- Buzz or hum: check the ground wire and reseat the cables
This part is pure physics, not audiophile mysticism. The cartridge generates a fragile signal. The phono stage restores the level and tonal balance the record expects. Get that load-bearing step right, and the rest of the setup finally gets a chance to sound good.
Aligning the Cartridge Is Where the Magic Happens
Cartridge alignment scares people because it looks fiddly. Fair. It is fiddly. But it's also the point where vinyl stops being a spinning object and starts becoming a stereo image.
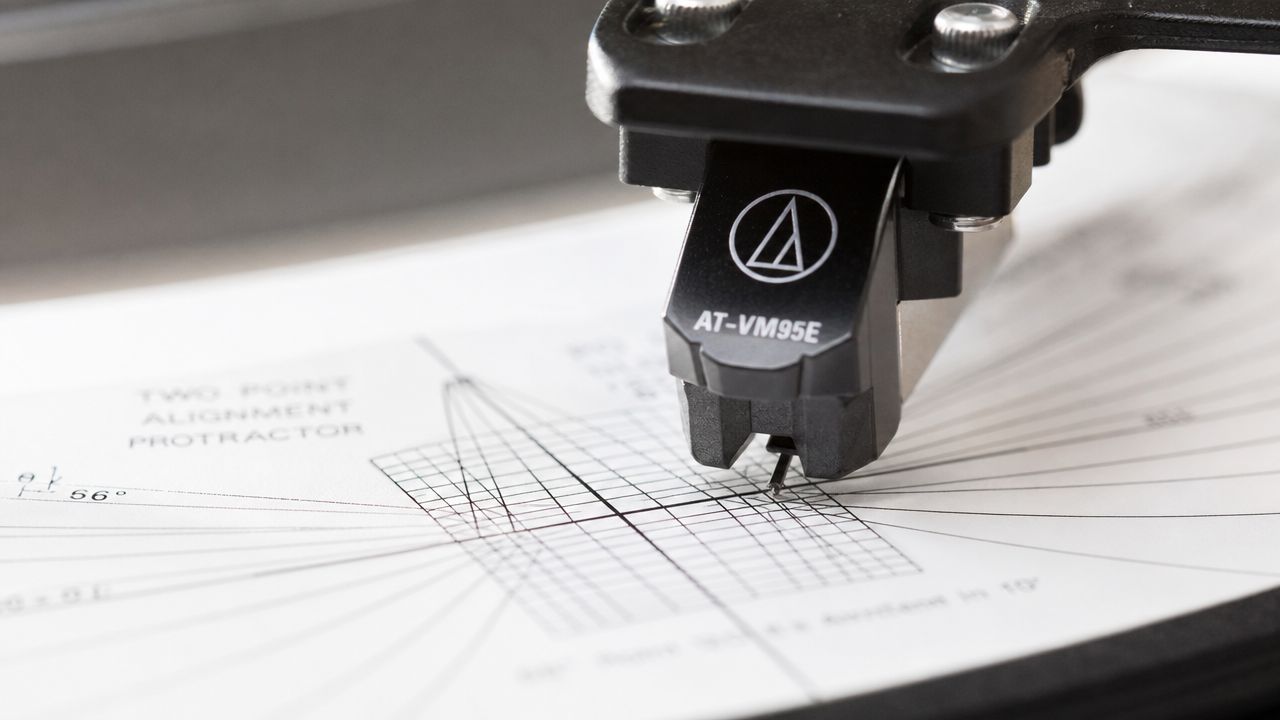
A cartridge that's mounted crooked doesn't merely sound “a little off.” It changes how the stylus meets the groove walls. That means distortion, lopsided imaging, and that peculiar feeling that the music has lost its center of gravity.
For a broader starter view, my beginner's guide to turntables covers the pieces around the deck. Here's the part that people avoid and shouldn't.
Geometry Decides the Soundstage
Alignment is really a geometry problem with sonic consequences. Overhang, angle, and azimuth all decide whether the stylus traces the groove cleanly or scrapes through it at the wrong attitude.
Azimuth is the easy one to hear once you know what it does. The stylus should sit vertically parallel to the record surface. When azimuth is off by even 0.5 degrees, one channel can lose up to 15% of its output. That's not subtle. A centered vocal starts leaning to one side. Snare hits lose their snap. The whole soundstage goes a bit cross-eyed.
Get the stylus upright in the groove and the room snaps into focus.
Overhang matters too. The cartridge has to sit at the manufacturer's intended distance and angle so tracking error stays under control as the arm travels across the record. You don't need to become a geometry monk. You do need to care enough to get it close.
Close Enough Beats Ignored
Here's the beginner mistake. People hear “alignment” and decide they'll come back to it later. Then later becomes months, and all that time they've been listening to smeared stereo and blaming the speakers, the pressing, the room, the moon phase, anything except the obvious.
Use the supplied alignment tool if your turntable came with one. If it didn't, use a proper protractor. Move slowly. Look straight on. Tiny changes matter.
A simple listening checklist helps after adjustment:
- Centered vocal: It should lock between the speakers, not drift.
- Clean inner grooves: The last tracks on a side shouldn't turn spitty and strained.
- Balanced channels: One side shouldn't feel louder or heavier.
If you want to see the basic motion before doing it yourself, this quick visual walkthrough is useful.
Not perfection. Competence.
That's enough to hear the deck wake up.
Tracking Force Is a Law of Physics Not a Suggestion
Tracking force is where a beginner setup either starts behaving or starts chewing up records.
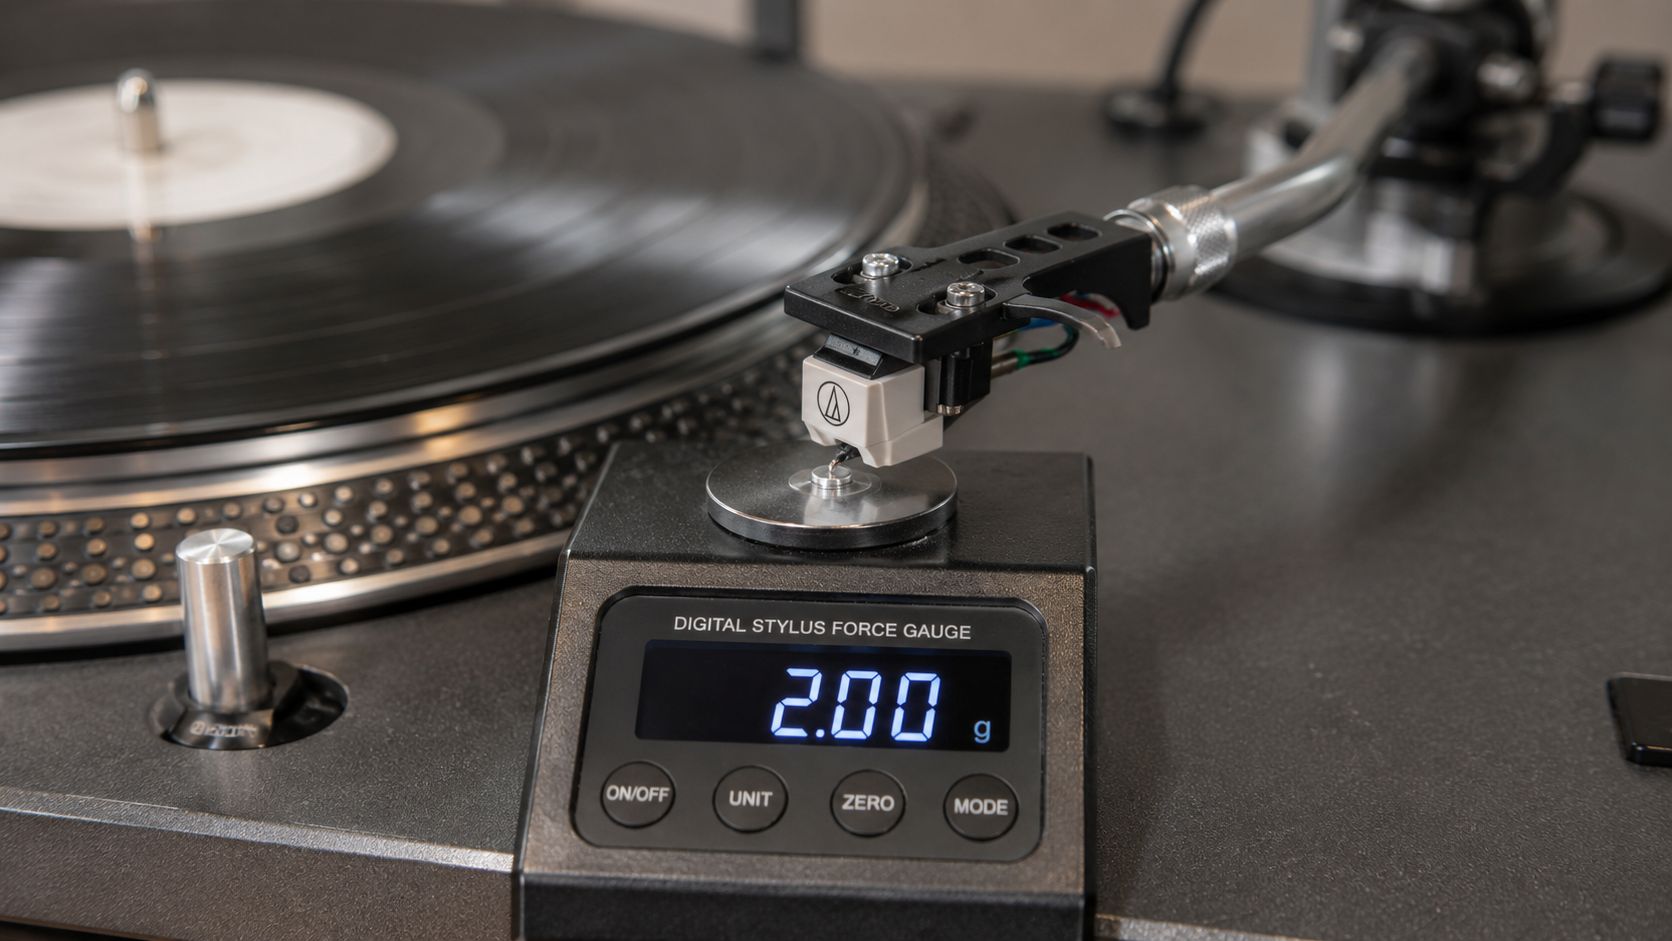
The stylus has one job. Stay planted in the groove at the force the cartridge was designed for. Miss that target and the contact patch goes wrong. Then you get mistracking, splashy highs, weak bass, fuzzy vocals, and groove wear that did not need to happen.
Beginners often get this backward. They assume lighter tracking force protects records. It usually does the opposite. A stylus that rides too light does not sit securely in the groove, so it chatters and smacks the groove walls on loud passages. Too heavy causes a different problem. It presses harder than necessary and adds wear through constant excess load.
Balance the Arm, Then Trust the Gauge
Set anti-skate to zero first if your turntable's instructions call for that during balancing. Then float the tonearm so it sits level, neither rising nor falling. From there, dial in the cartridge maker's recommended tracking force and verify it with a gauge.
Use the gauge because the counterweight markings are often close, not exact. Consumer Reports walks through the basic setup process and stresses setting tracking force correctly before playing records.
One blunt rule.
If you have not measured tracking force, you are guessing.
That guess shows up fast. Sibilants get edgy. Loud passages turn ragged. The cartridge sounds nervous, as if it is skimming the record instead of gripping it.
Anti-Skate Follows the Measured Force
Anti-skate is not mysterious. As the record spins, friction pulls the arm inward. Anti-skate pushes back so the stylus loads both groove walls more evenly.
Set it to match your measured tracking force as a starting point. If the cartridge is tracking at 1.9 grams, set anti-skate to 1.9 on a dial-based arm. Then listen and fine-tune only if your turntable manual or cartridge maker says otherwise.
A few symptoms make the problem obvious:
- Too little anti-skate: distortion and strain tend to show up sooner toward the inner grooves.
- Too much anti-skate: the stylus favors the outer groove wall and the sound can get thin or lopsided.
- Tracking force too light: sibilants spit, bass loses grip, and the stylus can mistrack on peaks.
- Tracking force too heavy: transients dull off and record wear rises for no benefit.
This part is load-bearing. Get the force right, match the skate, and the cartridge can do its job. Miss it, and no later tweak will save the sound.
Your First Spin Is a Diagnostic Tool
Your first record after setup shouldn't be a ceremony. It should be a test.
Use a record you know well. Not something new you can't judge yet. Listen for where the singer sits, whether cymbals sound crisp or splashy, whether bass is tight or puffy, and whether the last track on the side gets ugly.
A few symptoms point back to specific mistakes:
- Vocals leaning left or right: Re-check cartridge alignment and arm balance.
- Spitty “S” sounds or strain on loud passages: Tracking force is likely wrong, usually too light.
- Inner grooves sounding rough: Anti-skating force must match your calibrated tracking weight, so check that setting first.
- Hum underneath everything: Go back to the signal path and ground connection.
- Skipping when the room gets lively: Your shelf is still part of the problem.
If the setup is right, the turntable disappears and the record takes over.
That's what you're after. Not ritual. Not gadget worship. Control.
Author: Marque Hersh
Publisher: Supermarket Sound
Profile: Marque Hersh on Steam

